Home Blog Page 18

How to Start a Blog

0
How to Start a Blog

So you want to be a blogger? Creating a blog is a great way to unleash your creative passion. You can easily tell the world about that ‘thing’ that you are so interested in. All you need to do is to start a blog of your own, then the sky really is the limit!

It’s Easy to Start a Blog

These days becoming a blogger can be quite a simple process, thanks to the enormous range of use friendly programs, platforms and training aids available. But it can become time consuming, and it does come with some financial requirements. This blog will outline what those commitments typically are.

Note: This post may contain affiliate links. Please read our disclosure policy for more information.

Why I Chose to Start a Blog

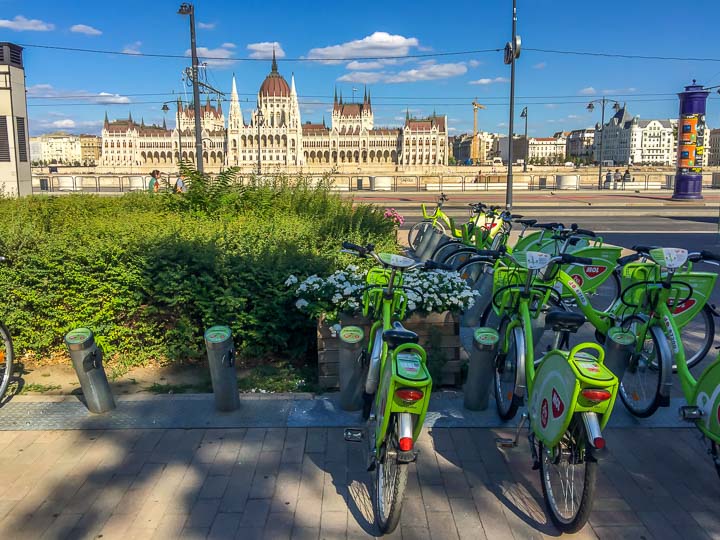
I decided to start my first blog in April 2017, a travel blog. At first I merely wanted to document the places we had travelled as a family. Then I realised that our stories could be useful to other travellers, as they research their next holiday. I decided I wanted to help other travellers to ‘find their way’, and to inspire them to go travelling. I am passionate in my belief that travelling can enrich people’s lives enormously.

Whatever your reason to be a blogger, I will try to give you a rough idea of the level of commitment required to publish a blog. To do this I’ll outline the basic workflow I follow to create our www.nicerightnow.com travel blog. At the bottom you will find a list of the software, financial and time requirements.

Travel Blog Photos
Travelling is a great way to learn about history

Initial Blog Set Up

Web Hosting

You will need a web-hosting platform to keep your blog on. I use Bluehost, probably the biggest web hosting service out there. You can use the free service (not recommended) or the paid subscription (highly recommended).


Web Creation Platform

WordPress is the most popular platform to build you blog on. It is free and can be accessed directly through your web-hosting service, particularly if you are using Bluehost to keep it nice and simple.

Domain name

You will need to purchase your very own domain name. I use GoDaddy to research available names, then just purchase them through Bluehost.

Theme

A theme is mandatory for your blog. Your chosen website theme is loaded using WordPress. I used RockyThemes to find a nice premium theme. You can also choose free WordPress themes, however premium themes are highly recommended.

Email List Provider

If you are planning to monetize your blog you will need to start building an email list, the backbone of monetizing strategies. You can set one up for free using Mailchimp.

Opt-in Form

To direct people to subscribe to your email list you will require an opt-in form. You can set up one for free using Mailchimp, or you can pay for a fancier service using a provider like Optinmonster.

Google Analytics

You will want to set up Google Analytics, which analyses the performance of your website. This is virtually mandatory for web sites these days. Good thing it’s a free service.

WordPress Plugins

There is an enormous library of free and paid plugins available for your WordPress site. These cover a whole plethora of functionality, from performance enhancements to visual eye candy.

Training for Bloggers

You will need some training to get started with your blog. And it needs to be current training, because each program and platform is constantly evolving. Here is a list of the main training programs which I used:

  • Getting Started with Rocky Themes – free Youtube training
  • Udemy – WordPress for Beginners – this course cost me $10 and instructed me in everthing I needed to know to set up a website and choose the best plugins. Best $10 I ever spent.
  • Itsalovelylife – 30 day Blogging Fast Track, a paid course which teaches how to monetize a Blog. This course is great value for anybody who wants to get serious about making money from their blog.

Planning your Blog

Schedule

It is wise to brainstorm a schedule of upcoming blog posts. This helps to alleviate ‘writers block’ where you don’t know what to write about. For this I use Google sheets which is 100% free.

Mind Mapping Tool

When it’s time to write a blog post in detail, a mind-mapping tool is invaluable for brainstorming the topics and content. For this I use Mind Node for Mac. There are free mind mapping software but I prefer this paid version for it’s seamless syncing between mac and iPad.

Research SEO Keyword

It is important to get Search Engine Optimisation right so that people can find your hard work using internet search tools. For this I use SEOBook, which has a great free SEO tool for finding the best keywords.

Write the Blog Post 

You can write your blog post on virtually any word processing software. I use Google Docs because it is accessible on any computer that you log in on, also mobile devices. It is also supported by mobile apps for full syncing. Very handy.

Take pictures and save Photos

Most good blog posts will require some images embedded. Gone are the days of text only blogs. These days a simple mobile phone photo is normally sufficient, however you will need somewhere to store them. I use iCloud as my personal photo library, with a paid subscription for a whopping 2TB of storage space.

Edit Pictures

Using and iPhone and the apple Photos app, it is possible to do some basic editing of your photos. It is a great idea to liven up your photos by cropping and adjusting light/colour settings. I prefer to use the professional software Adobe Lightroom. This is available as a free mobile version, however this has syncing limitations with your computer. I prefer the paid subscription which comes with cloud based options for syncing and editing photos between devices.

Typical travel blog photo
The Albertina Art Gallery

Export Edited Pictures

It is inevitable that you will compile a large collection of edited pictures from Lightroom, or whatever photo editing platform you use. It is important that these are exported at a suitable size for blog posts, nominally 100 kB for normal photos and 250 kB for feature photos. I save these using an easy filing system to Dropbox, so they are accessible from any computer.

Create Draft Web Post

Once your blog post and photos are all ready for posting, it is time to import these into WordPress to create your blog post. This essentially builds the web-page using an easy editing tool. It’s important for SEO rankings to add some internal and external hyperlinks in your blog post.

Check Spelling & Grammar

WordPress comes with a great spelling and grammar checker. It is mandatory to run each blog post through a final check before posting. Even better if you can get a human proof-reader as well.

Check SEO and Readability

One of the most important plug-ins on your WordPress site is the SEO Yoast tool. This checks your post for a whole range of SEO improvements, and readability issues. The plugin performs a range of checks for you automatically and advises you what improvements are necessary to improve your SEO rankings.

Publish Blog Post to Web

OK so all the hardwork has been done, the blog post is ready to publish. You can schedule your post to come out on a particular day using WordPress, or publish immediately. Either way this is the magic moment when your blog post becomes publically available online.

YouTube

You may like to spice up your blogs a bit by adding Video content. For this you will need to create a YouTube channel and learn how to create VLOG’s. The range of software and camera gear varies immensely. You can shoot video through your phone and use free software. My current set-up is to shoot through a GoPro video camera and edit using Apple Final Cut Pro X software, which is a top-end video editing software.

Here’s an example of a simple VLOG which can be embedded into a blog.

Check Post & Links

It’s normally a good idea to manually check your post and your hyperlinks in the published blog post. Sometimes you may find a broken link or something which is not published the way you intended. Time to go back and do some repair work if you find some faults

Promote Your Blog Post

Create Social Media Graphics

Canva is a free online tool for creating professional looking graphics to promote your blog. All you need is a photo and a little bit of imagination. I normally create a tall graphic for Pinterest and a landscape graphic for Facebook, Google+ and Twitter.

Blog Social media graphics
Canva graphic for a blog post

Attach Graphics to Blog Post

There are some great plug-ins available in WordPress to semi-automate promoting your blog post. I use the Social Warfare plugin to allow easy promotion of my blog posts. All that is required is to attach you Canva graphics and write some accompanying notes.

Automating Pinterest

Pinterest is one of the most important platorms for promoting blogs. It can be quite time consiming to do it properly. That’s why Tailwind is well worth paying the annual subscription. This fully automates publishing as many pins to promote your blog post as you care to set up. I automate between 10 and 20 pins per day using this service, and that probably saves me about 2 hours per week.

Automating Twitter

Twitter is another importaint platform for promoting blogs. I use a WordPress plug-in called Revive Old Post. This is another plugin which requires an initial purchase, then it fully automates tweeting your blog posts. Once again it saves a couple of hours a week in promotion time.

Managing your Blogs

All these blog posts require some sort of filing system. I use the free service Google Sheets to monitor blog posts and Social Media promotion. This is essentially a spreadsheet which records a range of different details about the progress of each blog post.

Evergreen Content

The best blog posts are evergreen content, that is they will remain current for many years into the future. For this reason it is necessary to do a regular review of each post to ensure the C content is still current. The frequency should be 6 monthly or 12 monthly.

Blog Banner for Social Media
Bucket List Ideas for Your Next Holiday

Time Commitments for Starting a Blog

As you can see, there is quite a steep learning curve to start a blog. And quite a steep demand on your time.

  • Each different software requires 2-4 hours to learn how to use it.
  • 2-3 training courses are recommended, each one will require 5-10 hours to complete.
  • Initial set-up of your website will require 20-30 hours.
  • Each blog post requires 4 hours to write, publish and check.
  • Each VLOG requires 4 hours to edit and produce.
  • Social media requires at least half hour per day.

Financial Commitments for Starting a Blog

The following costs to start a blog are approximate and are in US dollars. I’ll base these on my actual expenditure, you might find different options or some discounted rates. Keep in mind that you can eliminate many of these if you are on a small budget.

Paid software

  • $13 monthly – Bluehost Plus web hosting plan
  • $16 annually – Bluehost domain name
  • $59 one off – Themes Creativo Word Press Theme
  • $9 monthly – OptinMonster basic plan
  • $10 one off – Udemy course – WordPress for Beginners
  • $299 one off – itsalovelylife 30 day blogging fast track course
  • $30 one off – MindNode 2 for Mac
  • $10 monthly – Apple iCloud 2TB plan
  • $29 one off – Social Warfare plugin
  • $10 monthly – Lightroom Creative Cloud
  • $10 monthly – Dropbox Plus 1TB plan
  • $75 annually – Revive Old Post plugin
  • $119 annually – Tailwind
  • $300 one off – Final Cut Pro X

Free Software

  • WordPress
  • Mailchimp
  • Apple Photos
  • YouTube
  • Apple iCloud
  • Canva
  • Google Docs
  • Google Sheets
  • Apple iMovie
  • Instagram
  • Facebook
  • Twitter
  • Google+

Bottom Line

To start a blog you will need to invest a considerable amount of time and money. Time wise I suggest you will need to invest a minimum of 30 hours up-front in training, then 8 hours per week to publish a single blog post every week.

You will also require at least 20 hours up front to build your initial website. This is quite conservative I believe, most bloggers would spend a lot more time than this. Keep in mind that you should also adopt a continual learning mind-set, and will need to continually invest time in upgrading your skills.

Financially you can start a blog for close to zero cost. But this will come with some severe limitations which will make it very difficult to expand your reach, and to monetise. My cost estimates are US $727 initial costs, then $834 per annum in ongoing software costs. You will also require access to a computer and internet, which carry additional costs.

You can start a blog merely as a hobby, albeit a rather expensive, time consuming hobby. Or you can start a blog as a business, with a comparitively small initial and ongoing costs. It is a tremendously rewarding endeavour, and a terrific release for your creative side. Hopefully now you have a slightly better idea of the committments required to start your very own blog.

Happy Blogging!

Would you like a free copy of our Ultimate Bucket List?

Not sure where to travel to next? We have created the Ultimate Bucket List to help you plan your next trip. 1170 awesome travel destinations in 167 countries. And we want you to have it for FREE.

Send Me the Ultimate Bucket List

3 Day Ultimate Vienna Itinerary

0
Vienna Ultimate 3 day Itinerary bellevue palace

What springs to mind when you think of Vienna? It’s home to Mozart, Sigmund Freud and Vienna Boy’s Choir. It is where Adolf Hitler lived as a young man. Vienna has had such an amazing list of historically significant people.

I didn’t really know what to think of when considering Vienna as a holiday destination. But I was sure this city would be oozing classical style, amazing architecture, and fascinating history. I was right in every way.

Vienna Ultimate 3 Day Itinerary Schonbrunn Palace
Schonbrunn Palace is the Number 1 attraction in Vienna

We travelled from Budapest to Vienna on our European holiday. We left our bookings rather late, and really found it hard to get reasonably priced accommodation in Vienna. In the end we booked into the classy Hilton Vienna Danube Waterfront Hotel and stayed for 4 nights.

This was our longest stay in any European city on this holiday, because we were sure we would find more to see in Vienna than our other destinations. Bring on our Vienna Ultimate 3 Day Itinerary!

Vienna Ultimate 3 Day Itinerary

Note: This post may contain affiliate links. Please read our disclosure policy for more information.

Vienna Ultimate 3 Day Itinerary Danube River
The view over the Danube River from our hotel window

Getting to Vienna by Train from Budapest

We travelled to Vienna aboard a train from Budapest Hungary. It was only about a 3 hour train trip and was quite inexpensive, about 19 Euros per person. I know that you purchase tickets cheaper by booking earlier, however I also felt we got a good price for a last minute booking.  Booking online was quite easy on the MAV Sport website.

What we did find rather peculiar was that MAV  do not allow printing of the purchased e-ticket. Instead we were instructed to go to Budapest Station to pick up our tickets from the ticketing machine at the station. Instructions are clearly explained on the MAV Sport website after you purchase the ticket.

Budapest Train Station
Picking up MUV tickets in Budapest

The train trip was fast and comfortable. We had one ticket inspector come around just outside of Budapest, and another after we crossed the Austrian Border. Also a passport inspection as we crossed the Austrian Border. Overall we thoroughly recommend the MUV Sport train as an inexpensive, fast and comfortable transport option.

Vienna Ultimate 3 day Itinerary Vienna Train Station
Arriving at the modern Vienna (Wien hbf) Station

Tip: If you would like to see our VLOG of the journey from Budapest to Vienna, CLICK HERE.

Leaving Vienna by Bus

We found a cheaper option to leave Vienna on our way to Prague aboard a bus. The bus line was Regiojet, which is a sort of budget bus line used by students.  The cost was 15 Euros each and the trip took 4.5 hours. The bus departed from the Stadion Vienna bus terminal, which is several subway stops out of the city centre.

Conveniently for us it was a short 5 minute walk from our Danube Waterfront Hotel. The trip was not the most comfortable bus trip we’d been on, but it was on time and amazingly cheap. We recommend Regiojet for any budget minded travellers.

Vienna Ultimate 3 day Itinerary Bus station
Stadioncentre bus terminal in Vienna, waiting for Flixbus

Tip: If you would like to watch our VLOG of this bus trip CLICK HERE.

Getting around Vienna

We caught Uber around Vienna and found them to be quite reasonably priced. Our biggest fare was 18 Euros, from the train station in the city to our Hilton Vienna Danube Waterfront Hotel, overall about a 20 minute journey.

Apart from that we caught subway trains all over Vienna. We found the subway system extremely easy to figure out with good connections to all parts we wanted to travel to. Cost was only about AUD $8 per adult per day, which is quite reasonable. We just purchased our daily tickets from the vending machines in the subway station.

Vienna Ultimate 3 Day Itinerary awesome scenery
A ‘random’ sight while strolling around. They’re virtually on every corner.

Day 1 Sightseeing in Vienna

On day 1 we caught the subway out to Schonbrunn Palace, the number 1 tourist destination in Vienna. The history of this place is incredible, Napoleon Bonaparte once stayed there. It is where Boneparte’s son lived when he was exiled from France. It is where Mary Antoinette lived before her execution. And it is said that Adolf Hitler used to go there to paint pictures of the Schonbrunn Palace countryside.

Vienna Ultimate 3 Day Itinerary Schonbrunn fountain
Front of Schonbrunn Palace

We spent the whole day at Schonbrunn, such is the expansive nature of this massive summer palace of the Royals. We spent several hours at the Schonbrunn Zoo also, which is only about a 10 minute walk from the actual palace.

In the 18th century it began as a private zoo associated with Schonbrunn Palace, nowadays it is open to the public. It is one of the better zoos I have been to, definitely world-class and worth a visit.

Vienna Ultimate 3 Day Itinerary Schonbrunn Palace Gardens
The back of Schonbrunn Palace

Because we spent so much time in the zoo, we only had an hour or so to roam around the Schonbrunn Palace grounds. That’s a shame because I would love to spend a full day here, strolling through the many forest paths.

There is also an amazing royal maze that I would love to try. Of course the number 1 activity is a tour of the palace. I’m told that it’s wise to book this in advance online, however we did not participate in this tour so it was not concerning for us.

Vienna Ultimate 3 Day Itinerary Schonbrunn Zoo
Inside Schonbrunn Zoo

Overall Schönbrunn Palace and Zoo took up the entire first day of our visit. This place is so incredible it deserves a full day, any less and you will not fully appreciate the royal magnitude of this beautiful World Heritage site.

Big Bus Tours Vienna

We decided to purchase some Big Bus Tour tickets for both day 2 and day 3 of our sightseeing. If you read our previous blogs you will know that we took Big Bus Tours in both London and Budapest, and we were thrilled with this style of hop-on hop-off tour in both of those cities.

Unfortunately I was not as thrilled in Vienna. There are a few reasons why the Vienna Big Bus Tour is not as good as London or Budapest:

  • It is more expensive.
  • The Boat Cruise along Danube River in Vienna is rather boring compared to the Danube River in Budapest, or the Thames River in London.
  • Vienna city centre is much more compact, you can see it fairly easily by foot. No real need for hop-on hop-off.
  • The Route only covers 2 main areas outside of the city. United Nations area, which is not a terribly exiting area to visit. And Schonbrunn Palace, which is easily accessible (and quicker) by train.
Vienna Ultimate 3 Day Itinerary Big Bus Tours
Big Bus Tours Vienna

I say this from experience, because we did pay for the premium Big Bus Tour in Budapest. Once again they finished way to early at 6pm. Overall I felt that we did not get good value for our Big Bus Tour in Vienna. Having said that, it was nice to listen to the running commentary.

Tip: If you would like to see our VLOG of Day 1 itinerary CLICK HERE.

Day 2 Sightseeing in Vienna

On Day 2 we got on the Big Bus Tour and headed for the city centre. The whole city centre of Vienna is Unesco World Heritage listed, because it is so full of interesting buildings. We got off at the Strauss Monument and began a self guided walking tour.

With a Big Bus Tours landmark map in one hand, and Google Maps in the other hand, we saw the following main attractions:

  • Mozart’s Haus
  • St. Stephens Cathedral
  • Mozart’s Statue
  • Graben
  • Albertina
  • Opera House
Vienna Ultimate 3 Day Itinerary Mozart Haus
Mozart’s Haus

The highlight of the day was our visit to the Albertina Art Gallery. They have a large collection of paintings here by the famous Pablo Picasso, and some by Monet. It was a real thrill to see these famous and insanely valuable paintings. The building itself was exquisite, however the rest of the artworks weren’t very exciting.

We had recently been to London and Budapest National Art Gallery, and they had much more interesting collections (Picasso and Monet excluded).

Vienna Ultimate 3 Day Itinerary Albertina Gallery
The Albertina Art Gallery

The Albertina also had a section of classic preserved interior from yesteryear. Some very famous people stayed in this building and it was ab amazing step back in time, and a great feel for the ‘classic Vienna style’ that we imagined.

Vienna Ultimate 3 Day Itinerary Albertina inside
Classic Interior of the Albertina
Vienna Ultimate 3 Day Itinerary Albertina Picasso
Picasso and Monet at Albertina

Tip: If you would like to see our VLOG of Day 2 itinerary CLICK HERE.

Eating in Vienna City

Outside the Albertina we tried a hot-dog for lunch at the street vending hot-dog stall. This is a unique feature in Vienna. All over the city you see these little hot dog stands set up. Not American style hot dogs, but Austrian style. They are big and delicious.

Apparently these were designed to be a meeting place where the different classes of people would all join together in the same activity – buying a hot dog. Sounds good to me, and I thoroughly recommend them.

Vienna Ultimate 3 Day Itinerary street cafes
Amazing dining options in the World Heritage Old Town Centre

Day 3 Sightseeing in Vienna

On day 3 it was Clarc’s turn to choose an attraction. He chose the Military Museum, not too far from Schonbrunn Palace. One of the things we liked about the Military Museum was that they have a “tank garden” at the rear of the museum.

It looks like a large collection of British, German and Soviet tanks are restored and on display here. However, the tank garden was being restored when we visited so we only got a small peek through the fence.

Vienna Ultimate 3 Day Itinerary military museum
Tank Garden at the Military Museum

The Military Museum was on the Big Bus Tour route, so it was easy for us to get there. It was very cheap to get in, about 4 Euros each. And then you have to purchase a photography licence if you wish to take photos, that’s another 2 Euros. This museum is utterly breathtaking.

Vienna Ultimate 3 Day Itinerary inside military museum
The Military Museum entrance

It’s not huge by museum standards, however the collections are stunning. The main one that took my breath away was the medieval collections. There were complete sets of authentic medieval armour and weapons.

There was also a large collection of medieval paintings depicting famous battles over the centuries. Very authentic and thought-provoking.

Vienna Ultimate 3 Day Itinerary military museum grandeur
The stunning interior of the Military Museum

The military museum also had sections dedicated to World War 1, World War 2, and the navy. It was an interesting twist for me to see World War 2 museum based on German historical information.

Bellevue Palace

After the Military Museum we took a 15 minute walk to Bellevue Castle. This is a much smaller version of Schonbrunn Castle, but and interesting place to see. We did not do a tour through the interior, so our visit there only lasted about 20 minutes.

Vienna Ultimate 3 day Itinerary bellevue palace
Beautiful Bellevue Palace

After Bellevue Castle we tried to find a Big Bus Tour bus stop to go into the city centre. We searched but could not find the bus stop. We checked on the map, on the iPhone Big Bus app, on Google Maps. Alas this was another downside of Big Bus Tours – finding the bus stop. We ended up walking into the city, which took about half an hour. By then we were pretty much exhausted and found a Big Bus Tour bus-stop to take us back to our hotel.

Tip: If you would like to see our VLOG of Day 3 itinerary CLICK HERE.

Overall Impressions of Vienna

Vienna was such a strange place for me. I found that hardly anybody spoke English, so basic communication was an issue. I also found that shops were hard to find. Things like convenience stores, cafes, restaurants. They just seemed really hard to find, like there’s some trick that we didn’t know about. In other cities we don’t find a need to search for these conveniences, they just appear everywhere you go in the popular tourist areas.

Vienna Ultimate 3 Day Itinerary big churches
A church near our Big Bus Tour bus stop

Another observation was that shops close really early. There is a supermarket just near our hotel, I was caught out twice going there for supplies only to find out they were closed. And another time when we returned from our Schonbrunn Palace tour, we had trouble just finding somewhere to buy a meal.

We changed trains and went up to the street to look for a food outlet, there was nothing in sight. So we went into a major shopping mall on at 8:10pm on a Friday night, and all the shops had closed.

Vienna Ultimate 3 Day Itinerary old centre
In the heart of the old centre of Vienna

So Much More to See in Vienna

Vienna is renowned for it’s museum district, and it’s classical music. The large opera house is a great place to see an opera or a classical music show. These are open to the public every day. Whilst I would like to see these, I don’t have a desire to return to Vienna. It seemed like a fairly sterile sort of atmosphere to me, nowhere near as laid back and as pleasant as say Budapest.

To compare the two, it seemed to me that Budapest is a relaxed party town, whilst Vienna seems more institutionalised and sterile. I am glad we visited, mainly to see the amazing architecture. However, it’s probably someway down my list of favourite holiday destinations.

Vienna Ultimate 3 Day Itinerary opera house
Vienna Opera House

Would you like a free copy of our Ultimate Bucket List?

Not sure where to travel to next? We have created the Ultimate Bucket List to help you plan your next trip. 1170 awesome travel destinations in 167 countries. And we want you to have it for FREE.

Send Me the Ultimate Bucket List

Flight from Geneva to Paris

0
Flying Geneva to Paris on Easyjet

We travel from Geneva to Paris aboard EasyJet flight EZY1391.
Flight Duration was 1:10 hours.
Flight Cost: CHF 371 return for 3 people = CHF 62 per person for this trip.

Note: This VLOG may direct you to affiliate links. Please read our disclosure policy for more information.

Flight from Geneva to Paris Video

Leaving Geneva on EasyJet

The morning we left was bitterly cold, down to zero degrees celsius. There was snow not the mountains, the first snow fall for the season. We had to leave our residence at 8:30 to catch 3 buses to Geneva Airport. Boy was it cold!

When we arrived at the airport we endured a long line to get through customs, about half an hour. Then we got inside the terminal to find out we had to go the French Sector of the airport. This meant going through security all over again! Essentially we wasted half an hour in the Swiss sector of the airport.

Arriving in Orly Airport Paris was easy. We went outside and organised a Uber, which cost 35 Euros to get to the Eiffel Tower. Our wonderful AirBnB was only about 5 minutes walk from the Eiffel Tower.

Bus vs Train vs Plane Comparison

We booked our flight only the day before flying, so we missed the savings possible by booking in advance.

The way I like to compare bus vs train vs flight is using the GoEuro website. This website compares cost and duration to give you enough information to make an informed decision on the best way to go.

Train was our preferred option, the trip from Geneva to Paris is just 3 hours duration. However the return cost for 3 people was 600 Euros.

Bus was our least preferred option, especially when we discovered it is over 8 hours duration.

Flying was the big surprise, it came in at just over half price of the train, for a 1:10 hour direct flight on Easyjet. Luggage was one carry-on per passenger, however no weight restrictions applied. This suited us just fine.

What’s the Best Way from Geneva to Paris?

Train is a great option if you have big bags, but you probably want to research cheap tickets and book in advance. Flying is a great option if you are travelling lightly, and are lucky enough to find some cheap flights. We had an easy and comfortable trip all in all, exactly 6 hours door to door.

Total cost in Euros: 155 each way for the flight (3 people), 13 for Geneva bus fares, 35 for Paris Uber. Total 203 Euros to get 3 people from Geneva to Paris at short notice. Not bad, we reckon.

Would you like a free copy of our Ultimate Bucket List?

Not sure where to travel to next? We have created the Ultimate Bucket List to help you plan your next trip. 1170 awesome travel destinations in 167 countries. And we want you to have it for FREE.

Send Me the Ultimate Bucket List 

Budapest Ultimate 2 Day Itinerary

0
Budapest Ultimate Itinerary
Budapest has so much to see

Budapest is a beautiful Eastern European city with a rich and diverse history. It is made up of the old city of Buda on one side of the Danube River, and the old city of Pest on the other. These days they are united into a single city called Budapest.

Recent history includes the Ottoman Empire, to World War II invasion, Soviet Communist occupation, and finally independence. It is now a popular tourist destination with an “east meets west” atmosphere.

Note: This post may contain affiliate links. Please read our disclosure policy for more information.

Budapest Ultimate Itinerary Palace overlooking river
The Grand Palace

Getting to Budapest

We travelled to Budapest from Geneva in Switzerland. We flew on Brussels Airlines to take a day tour of Brussels, before arriving in Budapest at 10pm. This was a very interesting and fairly economical way to get to Budapest.

Once we arrived, we stayed at a lovely hotel in the city centre called Zenit Budapest Palace. We thoroughly recommend this hotel due to it’s awesome location and great breakfast. You can check out the rates on agoda.com.

Budapest Ultimate Itinerary downtown shopping district
Typical street scene in Budapest

Upon arrival at Budapest Airport, there is a counter in the arrival area selling transfer tickets aboard a luxury mini-bus into the town centre. For us it cost about $25 for 3 people. It was a fairly straight forward trip, except we were the last drop off and we drove all around Budapest for about 40 minutes dropping the other 7 passengers off.

Beware the cafes at the airport, I purchased a 500 ml bottle of water in local currency, and later converted it to find it cost me $6 for a bottle of water! I have also been warned to beware of dishonest taxi drivers.

Note: To see our VLOG on our trip to Budapest via Brussels CLICK HERE.

Getting Away From Budapest

Getting away from Budapest was a little more challenging, mainly because we purchased train tickets online using the MUV Sport website. We were heading to Vienna next, and the train tickets had to be picked up at the Budapest train station. It was a little tricky to figure out where to find the ticketing machine and how to find the train.

Budapest Ultimate Itinerary Budapest train station
Budapest Central Station

Tip: If you would like to find out more about catching the train, CLICK HERE to check out our VLOG.

Getting Around Budapest

We were extremely happy to see bicycle racks scattered around Budapest to conveniently hire a bicycle at any time. We had previously seen these in London, and also hired a couple of bicycles there. In London it was very simple process to figure out, however it turned out to be a little expensive. In Budapest was a completely different story.

Budapest Ultimate Itinerary MOL bicycles
Checking out the MOL Bubi bicycles

We spent about half an hour trying to figure out how to hire these Hungarian bicycles. We downloaded the MOL Bubi app, tried to register online, tried entering all the codes we were able to access. Most of the instructions were in Hungarian and difficult to understand, and the bicycles beat us on this occasion.

It’s a beautiful spot to ride bicycles with lovely bicycle paths along the Danube River and moderate traffic conditions. I recommend this as an ideal and cheap way of sight-seeing, just put in some time researching how to do it first.

Budapest Ultimate Itinerary Hire Bicycles
The Danube is a great spot for cycling

Big Bus Tours Budapest

Big Bus Tours are another popular way to get around in Budapest. The ticketing structure is nearly identical to the Big Bus Tours we used in London. They have free maps, headphones, and a guided narrated recording in several different languages.

Premium tickets also include boat cruises up the Danube River, night boat cruises and night bus trips. Like London they have 2 main bus routes, red and blue. They also have an iPhone app to see where the bus routes travel, and to find out more information about the attractions along the way.

We decided to purchase 48 hour premium tickets, the same as we did in London. We also had a similar complaint to the tours in London, that the Big Bus Tours finish a little bit early at 6:00pm.

Segway Tours

In the main shopping district and popular cafe districts of downtown Budapest we saw lots of people selling tours on Segways. They even offer 5 minute free trials to show you how easy they are to use. There are various tours ranging from 20 minutes to 2 hours, and the most popular tour seems to be along the Danube River and then up to the Grand Palace atop a big hill.

We all took advantage of the 5 minute free trial and lesson, and we were tempted to purchase a tour. These things are just so addictive! The cost would have been about AUD $220 for a 2 hour tour for 3 people.

In the end I figured that we’d be concentrating so hard on not falling off, that we would probably miss most of the sightseeing.

Budapest Ultimate Itinerary Segway Tours
Ramon doing some Segway training

Another option for transport were some curious motorised tricycles. These seemed to be available for both guided tours and general hire, we saw quite a few of these roaming all around Budapest. It certainly looks like a fun way to see the sights.

Day 1 Sightseeing in Budapest

On day 1 we basically just did a lap around the sights aboard the Big Bus Tour. We got off to do the boat cruise which takes a little over an hour. The cruise starts at the downstream part of the city and cruises upstream to Margaret Island, where it turns around and takes you back to the starting point.

You get great views of the Grand Palace and Parliament House in particular, but also many other grand and historic buildings. Budapest really is a beautiful city along the Danube River and a fantastic place to take the boat cruise.

Budapest Ultimate Itinerary Danube River bridges
The Golden Bridge near Margaret Island

After out boat cruise we decided to do some walking through the shopping and cafe districts of downtown Budapest.  This is a lovely part of the city, and a good place to pass a couple of hours.

There are souvenir shops galore, and all sorts of restaurants to choose from. We went for a restaurant with some local cuisine, and tried some Hungarian Goulash and Hungarian Sausage with sauerkraut.

Budapest Ultimate Itinerary Street Food
Lunchtime in shopping district

Night Bus Trip

We decided to try the night bus trip on the first night, since there were so many grand buildings along the river. The tour left at 9:00pm and lasted just over an hour.

Overall this tour was quite disappointing. Not because of the sights – there were loads of great sites along the way, all lit up at night. It was because of the bus driver. She never really stopped for us to take photos or admire the view. As soon as a great vista came into view, the bus driver just kept driving, and it was gone in a flash.

Unlike the day tours which are hop-on-hop-off tours, the night tour is just a single bus and there is no opportunity to get off.

Budapest Ultimate Itinerary Night Bus Tour
Night bus tour

Day 2 Sightseeing in Budapest

On day 2 we decided to focus on the number one attraction in town – the Grand Palace on the opposite side of the river. Once again we caught the Big Bus Tour over to our destination, then began the long walk up the big hill.

You can catch the funicular (cable tram) up the hill to save yourself a lot of stairs. However, we rather fancied catching all the sights along the way whilst we walked. Besides, there were breathtaking views of the Danube River and Budapest City all the way up.

Budapest Ultimate Itinerary Royal Palace Statue
The Palace grounds

At the top there are many free spots to get those “postcard perfect” photos of the Danube River and Budapest.

Budapest Ultimate Itinerary Royal Palace View
Nice views from the Palace

National Art Gallery

Also at the top of the Grand Palace hill we found a National Art Gallery, and we decided to pay the entrance and go inside. This was probably the most interesting Art Gallery I’ve been to. Most impressive were a wide range of dramatic paintings which illustrate the history of the region over the last 500 years or so.

There are some magnificent old Hungarian paintings, and by the end I felt like I had a reasonable pictorial appreciation of the history of Hungary. But be warned, this art gallery is huge. One could spend several hours wandering around here, taking it all in.

We spent a little under 2 hours here, and felt like we really rushed our visit.

Budapest Ultimate Itinerary National Art Gallery
Inside the National Art Gallery

The Art Gallery is spread over several levels, and eventually takes you right to the top of the Grand Palace. Here you will find perhaps the best views of the Danube River and Budapest that you will find, yet another great place for some amazing photo opportunities.

Budapest Ultimate Itinerary Royal Palace Horses
Guards outside the Art Gallery

Fisherman’s Bastion

The next stop after the Art Gallery was to continue walking along the hilltop to the Fisherman’s Bastion and the ‘Disneyland Church’. So nick-named because the spires look a little like that beautiful castle at Disneyland.

Along the way there is so much to see. Wandering around the Grand Palace area could easily use up a full day, if you have the time and the weather is nice. There is very little shelter so you really need a nice day to attempt this walk.

Budapest Ultimate Itinerary Beautiful Scenery
Approaching Disneyland Church

Passing by an interesting variety of little museums and curiosity shops, we finally made it to the Fisherman’s Bastion. There is quite a steep entrance fee if you wish to go inside this beautiful church, or walk up to the best photography locations.

There is a fantastic looking cafe right on the edge of the hilltop, which offers diners uninterrupted views over Budapest.

Budapest Ultimate Itinerary Disneyland Church
2 Churches

We then spent the next hour or so just walking through the streets on the way to the river. It’s only a 15-20 minute walk if you want to take the direct route, but we took our time. That’s because the meandering streets were so very beautiful and soaked in history.

Night Boat Cruise on the Danube River

That evening we went on the night boat cruise up the Danube River. We were sure it would be better than the night bus trip, and it did not disappoint us. The boat trip took about 50 minutes, and offers uninterrupted views of the magnificent Parliament House and the Grand Palace.

All the beautiful bridges also look amazing at night. Whilst you can skip the night bus tour, the night boat trip is one not to be missed.

Budapest Ultimate Itinerary Golden Bridge
The Night Cruise

Impressions of Budapest

Budapest is such an interesting place, there is a large variety of interesting things to do. It has many uniquely Hungarian museums, which we didn’t find time to visit. It’s also famous for being a spa city with many large open and public spas.

Once again we didn’t have enough time to visit any of these. We were thrilled with the sightseeing we managed to do. Every bit of it was amazing and utterly worth it.

Budapest Ultimate Itinerary Parliament House
The magnificent Parliament House

The dining prices were very up and down, some great bargains certainly do exist in Budapest but prices can also be fairly expensive, especially in the city centre. Traffic and crowds are not at all too busy in Budapest, which gave us a sort of mellow holiday feeling.

This is one city I’d love to come back to some day, next time I think 5-6 days would be a perfect length of time to chill out in this wonderfully relaxed city. Heaps to see and do, moderately priced and easy to get to. Budapest is my kind of holiday destination.

Budapest Ultimate Itinerary street cafes
Loving the cafe scene downtown

Would you like a free copy of our Ultimate Bucket List?

Not sure where to travel to next? We have created the Ultimate Bucket List to help you plan your next trip. 1170 awesome travel destinations in 167 countries. And we want you to have it for FREE.

Send Me the Ultimate Bucket List

London Ultimate 2 Day Itinerary

0
London Ultimate 2 Day Itinerary parliament

London, Paris, Rome, New York. These are the most famous cities on earth. Everybody talks about them, and everybody has heard of them. Everybody knows just a little about them, and everybody would love to visit them, even if just for a short while. We booked an Airbnb in Paddington for 3 nights for our first ever visit to London.

We knew very little about London or what we wanted to see there. But because it is one of the most famous cities on earth, we knew that there would be heaps of amazing things to see and do.

London Ultimate 2 Day Itinerary Big Ben
Big Ben!

Where to Stay for Your London Sightseeing

We chose the Paddington area, because our brief research revealed that it’s a nice safe area. But most importantly, the Heathrow Express train has a direct connection between Heathrow Airport and Paddington Train Station.

We chose a place just 8 minutes walk from Paddington Station, so that it would be easy for us to get there from the airport, and easy to get around on the public transport system. As it turned out, we did not make use of the Heathrow Express or the Public Transport system!

London Ultimate 2 Day Itinerary Paddington accommodation
Our Airbnb rental in Paddington

Getting Around London

We learnt that the Heathrow Express costs 20 British Pounds per person to get from Heathrow Airport to Paddington Station. That’s 60 pounds for the three of us. Online they cost 50 pounds for the three of us. I then researched some online airport transfers and found one for 42 pounds, so that was a no-brainer.

I booked a transfer easily on my iPhone from Qatar airport on the flight in. As it turned out, we could have taken an Uber for about 35 to 40 pounds. On our return from Paddington to Heathrow Airport Uber was the cheapest option for us, and cost 38 pounds.

After arriving in London we learnt about London Big Bus Tours. These seemed to be a convenient option for us to get around London. It would cost about 85 pounds for 2 days for the 3 of us. It’s a hop-on hop-off bus with a bus-stop right near Paddington Train Station, and it has a return boat trip along the Thames River included.

Our research revealed that we needed to pay a minimum of 15 pounds per person per day for Zone 1 daily Public Transport tickets. Another no-brainer, and we elected to purchase Big Bus Tour tickets instead of public transport. It would be roughly the same cost, but we got a bonus Thames River Cruise.

touThe Big Bus Tour bus

Big Bus Tour or London Pass?

We were very tempted to purchase a London Pass, which gives you virtually unlimited access to access all the major attractions around London. They are very expensive if you pay for them individually. We had to consider how energetic we wanted to be.

Getting a London Pass means you have to be flat out for 2 full days to make best use of them. They have hop-on-hop-off bus tickets included so this is easily accomplished. But we soon realised our energy levels weren’t really up to that.

We pictured ourselves racing around trying to get the best value from the London Pass and ending up utterly exhausted. It’s a great option if you’re up to fast paced long days, but this simply did not suit us.

London Ultimate 2 Day Itinerary world heritage area
Big Bus Tours are a great way to see the sights

Big Bus Tours were perfect for us. It allowed us to take the 2 main Big Bus routes to get around and see the most popular sights of London. We could lazily photograph the attractions from the comfort of our double-decker open top buses.

Or we could choose to get off and take some pictures whenever we chose. We did not really have enough time to do many paid tours, we simply wanted to cover a large amount of attractions in 2 days. Big Bus Tours were perfect for our needs.

London Ultimate 2 Day Itinerary city streets
Sometimes you get a choice of seats

Day 1 in London

On the first day our first major stop along the Big Bus Tours route was Trafalgar Square. This is a lovely big square dotted with massive statues. The National Art Gallery flanks one side of the square, and the whole city scape is full of amazing architecture.

It’s actually a great starting point to take self-guided walking tours in virtually every direction, however we simply got back onto the Big Bus Tour to drive to the next sights.

London Ultimate 2 Day Itinerary National Library
One of the great statues of Trafalgar Square

St. Paul’s Cathedral was our next stop. We stopped here for lunch thanks to a ‘healthy food supermarket’ opposite St Paul’s Cathedral. This store took us completely by surprise, it was full of take out healthy choice meals, and very cheap by London standards. We had one of the most delicious and healthy lunches we’ve eaten for a long time.

London Ultimate 2 Day Itinerary Saint Paul's Cathedral
St Paul’s Cathedral as seen from the Big Bus Tour

London Tower

Next stop for us was the Thames River near the London Eye. Here we had some great views along the Thames River, including the magnificent Parliament House building. Back on the bus again, to the northern most point of the bus-route, the London Tower Bridge. This is on the must see sights of London, it is the iconic bridge across the Thames River you always see on postcards of London.

London Ultimate 2 Day Itinerary tower of London
London Tower

What we did not realise was that the London Tower Bridge is right next to the Tower of London. As it turns out the Tower of London is not just a tower, but a large complex of medieval castles and towers.

I really wanted to pay the entrance into the Tower of London because medieval castles are kind of my thing. However the gate staff advised us that a full 3 hours area required to do a tour of the Tower of London.

Last entry is at 4:30pm and it closes at 5:00pm. Since it was 3:30 pm already we chose not to pay entry, because we would have to leave early and disappointed.

London Ultimate 2 Day Itinerary tower of London
London Tower

Cruising on the Thames

After the Tower of London we boarded the boat to cruise down the Thames River to Westminster Abbey. This was a tremendously entertaining cruise, mainly thanks to the tour operator giving a light-hearted commentary all the way down the river.

It was rather like listening to a stand up comedian, only he was also giving us an amazing history lesson. Of course were invited to leave him tips as we got off the boat. We are so glad we took the boat trip, and were happy to tip our entertaining host.

London Ultimate 2 Day Itinerary London bridge
Cruising under London Bridge on our cruise

Westminster Abbey and the World Heritage Bonanza

Back on the Big Bus Tour and we went next to the famous Westminster Abbey. In my opinion this is the most amazing sight in all of London. Westminster Abbey is the large building where kings and queens have been coronated for centuries; it is a truly iconic and massive structure. It is also Unesco World Heritage Listed.

But what I find truly amazing is that when we were standing outside Westminster Abbey, we could see 4 Unesco Work Heritage sites from where we were standing. Westminster Abbey, St Margaret’s Church, Big Ben and Parliament House. It may be the only place in the world where it’s possible to see 4 World Heritage sites without moving a single step!

London Ultimate 2 Day Itinerary Westminster abbey
Part of Westminster Abbey

Buckingham Palace

From Westminster Abbey we wanted to take the Big Bus Tour to Buckingham Palace. The only problem was, we could not find the Big Bus stop or the Big Bus route. We walked around for some time looking for it.

In the end we just walked to Buckingham Palace, a walk of about 40 minutes. It’s actually a lovely walk through some beautiful old gardens and parkland. Along the way we watched people feeding lots of very cute and playful squirrels.

London Ultimate 2 Day Itinerary Buckingham palace
Getting close to Buckingham Palace

Buckingham Palace is definitely worth a look, although there’s not a lot that can be seen from the main viewing area at the front. The front facade of the massive buildings can be seen but that’s about all.

Even seeing that small sample of this magnificent palace is well worth a look, and the gardens across the road are incredibly beautiful. It is such an iconic place it’s worth the effort just to say you’ve been there.

London Buckingham palace
Buckingham Palace

Lost in London

After Buckingham Palace we once again tried to find the next Big Bus Tour bus stop. We found the paper map rather difficult to follow and failed find the bus stop. Our feed were aching and we  ended up hailing a cab to get back to Paddington.

The cab cost about 15 pounds, which we paid using the ‘tap and pay’ terminal in the back. It was later that I realised that Big Bus Tours has a an iPhone with an easy bus stop finder. Should have read the fine print!

Note: to see our VLOG of Day 1 and the Big Bus Tour CLICK HERE.

Day 2 in London

Our second day in London was fairly ambitious. It was children’s day. By that I mean that we let our young son choose what he wanted to see. Clarc wanted to see some museums, so we researched the most interesting looking ones.

Clarc wanted to see the Guards museum, which is devoted to the history of the Royal Guards and some military history as well. We also chose the HMAS Dublin, the military ship museum moored near the London Tower Bridge. Also the Museum of Anthropology, which has the largest collection of dead animals on the planet.

London Ultimate 2 Day Itinerary Paddington cafe
Breakfast at our favourite Paddington cafe

Just when the day was starting, the rain came. It was only patchy light rain, but enough to upset our plans. We decided to go for an easily accessible indoor stop first, and got off at the National Art Gallery.

This turned out to be an amazing Art Gallery and well worth the visit, particularly because it has many magnificent masterpieces on display. We spent the next couple of hours wandering through this expansive Art Gallery until the rain cleared.

London National Art Gallery
Outside the National Art Gallery

After the National Art Gallery we had about a 20 minute walk to the Guards Museum. This passed by 10 Downing Street and a few other lesser known sites, and overall was an amazingly interesting walk.

The Guards Museum was very cheap, only a couple of pounds each for entry. It was fairly small and only took about half hour to view. It was not terribly exciting in my opinion, not as interesting as were thought it would be. We were not allowed to take any photos inside either.

London Ultimate 2 Day Itinerary guards museum
The Guards Museum

HMAS Bismark

Next stop was the HMAS Bismark. Just when we arrived some heavy rain started to fall. Since it was about a 20 minute walk from the Big Bus stop to the Bismarck we took shelter in a delightful Paul’s coffee shop on the Thames River.

By the time the rain stopped it was too late to go to the HMAS Dublin, due to the 5:00 pm closing time. Yet another change of plan.

London Ultimate 2 Day Itinerary London Tower Bridge
That’s the HMAS Bismark

Hyde Park

What we decided to do was go to Hyde Park and try to rent some bicycles. The plan was to ride around Hyde Park, and also to see Canterbury Gardens, Canterbury Palace and Albert Hall. Bicycle hire racks are dotted all around London, and we soon found one near Hyde park.

They seemed ridiculously cheap, only about 2 pounds each for 24 hours hire. We were treated to a couple of hours sunshine and had a wonderful time cycling around Hyde Park and Kensington Gardens.

Best of all we were able to cycle to our Airbnb and return the bicycles to a hire rack just near our apartment.

London Ultimate 2 Day Itinerary Kensington palace
Kensington Palace

Cost of cycling

I was able to pay for the bicycles using my credit card tap and pay, it’s oh so easy. But after our holiday I checked the credit card statement and found that on top of the hire cost, they charged an extra fee for “usage costs”.

The extra charges amounted to over AUD $20 more. So it ended up costing about AUD $28 for 2-3 hours of cycling, not so cheap after all. But it was healthy and fun, so I’m not complaining.

London Ultimate 2 Day Itinerary bicycle hire
The bike hire rack on our Airbnb street

Note: To see our VLOG of Day 2 in London CLICK HERE.

Overall Impressions of London

There is so much to see in London. Even after 2 days of solid sight-seeing you can’t help but feel a little disappointed that so many attractions were missed. London is just dripping with fascinating history, like some buildings erected some 1500 years ago in Roman times. I guess that’s a good reason to go back for another visit, which we fully intend to do.

Prices are crazy expensive for us, as Australians. And that’s with the exchange rate at the historical best it’s been for many years. It’s quite normal to pay $40-$50 for a fairly light cafe style meal for 3 people.

The bicycles were a shock, but the Big Bus Tour was quite reasonably priced, especially with the Thames River Boat Cruise.

London Ultimate 2 Day Itinerary Parliament House
Parliament House

Impressions of the Big Bus Tour

If you’re wondering whether to get a Big Bus Tour in London, here are a few factors which may help you to decide.

Weather in London

The tour is great if it’s a nice day and you can sit in the open air section at the top of the double-decker bus. But if it’s wet and you have to retreat downstairs undercover, it is just nowhere near as good or interesting. You can’t see as much and you certainly can’t take good photos from the bottom level. I would not do Big Bus Tours unless it’s dry weather.

Are you an Early Riser?

The last Big Bus is about 5:30-6:00pm. If I have one complaint, it’s that they finish too early. This means that if you start your tour in the late morning you only have a short time to cover a lot of ground. You really need to start at 8:00 to 9:00 am to get your value for money.

Do You Want to Pay to Go Inside the Attractions?

If you want to pay to go inside attractions, you should count how many attractions and consider getting a London Pass instead. Paying for Big Bus Tours as well as paying entry fees can soon add up to make it an expensive day.

Do You Have 2 Days to Spare?

Big Bus Tours offer 24 hour or 48 hour passes. The 48 hour passes are only a slight increase over the 24 hours passes. Thus the 48 hour passes offer much greater value than 24 hour. You should also factor in whether you want premium tickets, which include boat trips and night tours. I recommend you do.

London Ultimate 2 Day Itinerary world heritage London tower
Sightseeing aboard the Big Bus Tour

New York, London, Paris or Rome?

So should you choose to go to London, or instead choose one of the other famous cities? I think London should be on the bucket list of any serious world traveller. There is so much to see and do, and the history is so colourful and interesting.

However, London can be so expensive that you probably need to compress your sight-seeing into a fairly short trip. One thing I can say about London, is that it’s a city with so much to see that I feel like we could go back again and again, and still find new attractions. You certainly can’t say that in every city you visit. I can’t wait until our next visit to London!

Would you like a free copy of our Ultimate Bucket List?

Not sure where to travel to next? We have created the Ultimate Bucket List to help you plan your next trip. 1170 awesome travel destinations in 167 countries. And we want you to have it for FREE.

Send Me the Ultimate Bucket List

California Road Trip Wildlife Spotting

0
California Road Trip Wildlife Black Bears in sequoia

California is one of the best places for an amazing road trip. Roads are long and wide, and the scenery is diverse. Here you will find beautiful pacific coastline and the high mountain tops of the Sierra Nevada’s. We did our own Highway 1 Classic Californian Road Trip, and what really took us by surprise was the amount of wildlife we spotted along the way.

Starting Point for our California Road Trip

Starting in Los Angeles we drove north to Santa Barbara. We then stopped at Morro Bay before continuing north to Monterey. Then onto San Francisco and a detour to 3 famous National Parks – Yosemite, Sequoia and Kings Canyon. Here is our account of some of the amazing wildlife we spotted along the way.

California Road Trip Wildlife spotting Santa Barbara blue whale
Blue Whale outside Santa Barbara Museum

Santa Barbara Museum of Natural Science

Wildlife spotted: Blue Whale skeleton, large variety of stuffed animals

Our first stop was Santa Barbara, where we stopped for 3 nights. On our first day we visited the Santa Barbara Museum of Natural Science. The first animal we saw was the skeleton of a Blue Whale out in the car park. Inside we didn’t see any living wildlife to note.

However we did spend a couple of hours checking out the outstanding display of native wildlife found in Southern California. Everything from full-grown Bears to Elk to birds of prey, down to all the tiny critters.

And there are loads of informative boards to read explaining what wildlife and habitats are found in Southern California. It’s a great way to kick off a wildlife adventure with some solid local education.

California Road Trip Wildlife spotting Santa Barbara
Horned critters inside Santa Barbara Museum

Stearns Wharf Santa Barbara

Wildlife spotted: Pelicans, Sea Lions

Later that day we headed down to Stearns Wharf at the main waterfront precinct of Santa Barbara. We had lunch at an awesome waterside restaurant on the wharf called Moby Dicks. Over lunch we got to see many Pelicans doing their thing all around us.

Also there are Sea Lions visible from the wharf, although you will do better with binoculars because they are quite far off. There’s a buoy out to sea full of them, and an island near the big marina also.

California Road Trip Wildlife spotting Santa Barbara pelicans
A pontoon full of Pelicans and Sea Lions at Santa Barbara

Santa Barbara Whale Watching

Wildlife spotted: Humpback Whale, Mako Shark, Pelicans, Sea Lions, Dolphins

Santa Barbara is a great place for whale watching thanks to the very deep Santa Barbara channel just off shore and the Channel Islands. We had a marvellous half-day cruise aboard the Condor Express and spent close to half an hour watching a single Humpback Whale breaching and lunging upwards into the air.

We witnessed a giant feeding frenzy with a massive school of Herring in the middle, with all manner of sea animal getting a piece of the action.

California Road Trip Wildlife spotting Santa Barbara whale watching
Whale Watching off Santa Barbara

Northbound from Santa Barbara

Wildlife spotted: Birds of Prey

As you leave Santa Barbara driving northbound, you start driving into some low mountains. It was in these mountains found a terrific roadside stop overlooking a giant valley. This is an outstanding place to spot large Birds of Prey, and we saw some gliding on the thermals. It is reputed that you can sometimes spot the rare California Condor here!

California Road Trip Wildlife spotting Santa Barbara eagles
Birds of Prey can be seen from the roadside North of Santa Barbara

Morro Bay

Wildlife spotted: Sea Lions, Sea Otters, Squirrels

Just north of Santa Barbara was our next overnight stop, Morro Bay. We stopped here for one night and were fortunate to see several groups of Sea Otters in the main estuary, frolicking in the water about 20 metres from us.

Also in the same estuary we saw a group of Sea Lions, and heaps of Squirrels playing around the shore. You can hire some kayaks or boards and get up close to them, if that’s your thing.

California Road Trip Wildlife spotting Morro bay sea otters
Sea Otters at Morro Bay

San Simeon

Wildlife spotted: Elephant Seals

San Simeon is famous for its large colonies of Elephant Seals, just a few miles north of the town. The main colony is well sign-posted and very easy to spot. These are one of the best close encounters you will find along this section of coastline and not to be missed.

California Road Trip Wildlife spotting san Simeon elephant seals
San Simeon Elephant Seal colony

Monterey

Wildlife spotted: Sea Lions, Sea Otters

No trip to Monterey is complete without driving along the famous coastal road between Big Sur and Monterey. This is world-class driving and one of the most scenic roads on the planet. There are many roadside stops, and at some of these you will be able to see Sea Otters and Sea Lions in the water. We were lucky enough to see them.

Yosemite National Park

Wildlife spotted: Deer, Blue Jay.

Yosemite National Park is well-known for it’s large population of inquisitive Bears. There are very strict rules for Bear safety, like leaving all your food locked away safely in bear lockers. We were hoping to catch our first glimpse of a wild Bear, alas we missed out.

However we did see a couple of groups of wild Deer, up along the Glacier Point Road. We were also thrilled to see several colorful Blue Jay birds bouncing around near our tent in Housekeeping Camp.

California Road Trip Wildlife spotting Yosemite blue jay
A Blue Jay bouncing around near our Housekeeping Camp tent

Sequoia National Park

Wildlife spotted: Deer, Bear

We spotted more Deer in Sequoia National Park. Whilst driving out of the park we were lucky enough to see 2 wild Bears searching for food in one of the meadows. They were a couple of hundred metres off the road, but we enjoyed watching them for some time.

It was us that gave up and left the Bears to their searching for food. We were truly amazed to see these huge creatures in the wild.

California Road Trip Wildlife spotting wild deer
Sequoia Deer

Squaw Valley

Wildlife spotted: Turkey, Tarantula

We stayed in an Airbnb RV out in some fairly open country in the foothills of the Sierra Nevada mountain range. We were hoping to see some Deer on our 5 acre block, as they are reasonably common.

Although we saw no Deer, we did see a Wild Turkey up  close. We saw several small mammals which we have absolutely no idea what they were. The scariest find was in a grassy field, where we spotted a Tarantula’s hole. I have to say this was one of the scariest wildlife experiences for me!

California Road Trip Wildlife spotting wild turkey
A Wild Turkey at Squaw Valley

San Francisco

Wildlife spotted: Sea Lions

Who would think that San Francisco is a great place for spotting wildlife? There is a colony of Sea Lions at Pier 39, and you can get within about 20 metres of them for a really close look. This is a must see attraction when in San Francisco. And Pier 39 is a great place to spend the afternoon also.

San Francisco Pier 39 seal lions
Clarc checks out the Sea Lions at Pier 39

California the Wildlife State

So in our opinion San Francisco is an awesome wildlife state. At every overnight stop we made, we were lucky enough to see some great wildlife. And I know that we only just scratched the surface, we didn’t intentionally go out on wildlife spotting safaris.

And the best thing is, you don’t have to be an adventurer to find wildlife in California. All you really have to do is go there, and you will find it!

California Road Trip Wildlife - squirrels in squaw valley
A shout-out for all those cute critters we saw, but don’t know what you are called!

Would you like a free copy of our Ultimate Bucket List?

Not sure where to travel to next? We have created the Ultimate Bucket List to help you plan your next trip. 1170 awesome travel destinations in 167 countries. And we want you to have it for FREE.

Send Me the Ultimate Bucket List


11 Interesting Tips for Noi Bai Airport, Hanoi, Vietnam

0
P080 Moscow to Bucharest

Have you been to Noi Bai Airport in Hanoi Vietnam? This is an awesome airport with some first class facilities. This is a new airport with great dining and impressive facilities, all kept spotlessly clean. This International airport in Hanoi may well be Asia’s best airport.

Note: This post may contain affiliate links. Please read our disclosure policy for more information.

Departing Noi Bai Airport, Hanoi

On day 1 of this family holiday adventure, the first stop was Hanoi Noi Bai Airport on my way to London. The plan was to meet my family in Bangkok, then take a flight to London via Qatar. Sounds easy enough right?

11 Interesting Tips for Noi Bai Airport

There are a few things I like and dislike about Hanoi Noi Bai Airport. I’ve been through here plenty of times and know this airport like the back of my hand. Here’s a tongue in cheek video of the airport.

Things I Like at Noi Bai International Airport Terminal 2

  1. Noi Bai is a classy and new airport. It was opened in 2015, and still has a brand new feel about it. It kind of feels first class.
  2. There is an excellent variety of dining options. The trick is to go upstairs in the main departure hall, before you go through customs. Meals here are quite cheap, and mostly Vietnamese cuisine.
  3. The customs area is super fast at the Hanoi Airport. You rarely have to wait more than a couple of minutes to get your passport stamped in departures. Arrivals is a different story, sometimes there are long waits upon arrival.
  4. The drop off and pick up zones at Noi Bai are very user friendly, and fast to navigate. Getting a Taxi at Noi Bai is a piece of cake, as well as the airport bus.

Things I Don’t Like at Noi Bai Airport

  1. It is always hazy at Hanoi Noi Bai. Yes Hanoi has chronic air pollution issues, and it’s blatantly obvious at Hanoi airport.
  2. The airport in Hanoi has tasty but expensive burgers. Like most big airports there are a couple of Burger Kings, and there are also a couple of Popeyes fast food outlets. But goodness, these are expensive burgers!
  3. Challenging Airport Taxi System. It pays to research how to get your airport transfer, if you don’t the different options can be quite daunting for new arrivals.
  4. The duty free shopping is now so impressive, particularly if you’re looking for toys or gadgets. If fact gadgets and electronics are virtually non-existent at Noi Bai.

Unusual Things At Noi Bai Airport

  1. The sleep pods at Noi Bai Airport Hanoi are so cute. The pods cost 381,000 Vietnamese Dong for 2 hours.
  2. I love the crazy scenic toilets. These have floor to ceiling glass walls so that you can see the roads outside while you are… you know.
  3. Vietnamese Pho – there are heaps of options to get your last fill of Pho before leaving Vietnam. This is kind of the national dish, made of noodles, meat and vegetables.

What About a Hotel Near Hanoi Airport?

There are no hotels in Noi Bai International Airport Terminal 2, except for the sleeping pods shown in the attached videos. There are heaps of hotels near Noi Bai Airport, just a short taxi ride away. These are remarkably affordable, and you should have no problem securing a discount.


Booking.com

The Final Word on Hanoi Airport

Here are some final tips for Hanoi Airport:

  1. The Hanoi Airport Code is HAN.
  2. I you want to learn how to get from Noi Bai Airport to Old Quarter Hanoi, read this post for all the different options.
  3. We also have a Quick Travel Guide for Hanoi to help you on your way.

Noi Bai is a pleasurable airport to experience, if there is such a thing. I hope you enjoy your trip through this airport as much as I do. And don’t forget to try the delicious Vietnamese cuisine while you’re there!

Would you like a free copy of our Ultimate Bucket List?

Not sure where to travel to next? We have created the Ultimate Bucket List to help you plan your next trip. 1170 awesome travel destinations in 167 countries. And we want you to have it for FREE.

Send Me the Ultimate Bucket List 


Luxembourg City Promenade Walking Tour

0
Luxembourg City Day Tour

Luxembourg City is an amazingly scenic city to do a walking tour, especially in Autumn. We did a self-guided walking tour along the City Promenade to take in the best panoramic views of the city and surrounds. What we discovered literally took our breath away. This city is INSANELY beautiful in Autumn.

Luxembourg City Promenade Tour

In this VLOG we do a comprehensive tour of the City Promenade, following one of the published guided tour leaflets we found in our hotel, the Hotel Central Molitor in Luxembourg City.

Not only did this suggested walking tour show us the route to follow, it also gave us some brief notes on each of the attractions. The brochure, published by the Luxembourg City Tourist Office, stated that it is a 2 hour walk of 4km. From out hotel we ended up taking about 5 hours and walked 6km.

Main Attractions in Luxembourg City

Here are the main attractions which we cover in this VLOG:

  • 19 Liberte – Administration building
  • Place de Metz – Banking building
  • Adolphe Bridge – The “new bridge”
  • Casino Luxembourg – Built in 1882
  • Gelle Fra Memorial – Built to honour soldiers
  • Constitution Square – Built in 1644 for great valley views
  • William Square – Named after King William II
  • Town Hall – Built in 1830 in neo-classical style
  • Michael Rodange Monument – after the famous writer
  • Equestrian Statue of William II – large statue in William Square
  • Cercle Cite – Administration and festival building
  • Place d’Armes – Palace of the City completed in 1671
  • Dicks – Lentz Monument – in honour of 2 national poets
  • National Library – Built 1606
  • Cathedral of the Blessed Virgin Mary – Built 1613 in Gothic and Renaissance style
  • Congregation Church – Built 1739 in Baroque style
  • Clairfontaine Square – in Government district
  • Grand Duchess Charlotte Memorial – in honour of the Grand Duchess
  • National Archives – Built in 1862
  • Corniche – The most beautiful balcony in Europe
  • Luxembourg City History Museum – Awesome views of the valley below
  • Bock Promontory – Cradle of the City of Luxembourg
  • Bock Casemates – Underground defence network
  • St.Michael’s Church – Oldest shrine in the city built 987
  • Fishmarket – Historical town centre

Would you like a free copy of our Ultimate Bucket List?

Not sure where to travel to next? We have created the Ultimate Bucket List to help you plan your next trip. 1170 awesome travel destinations in 167 countries. And we want you to have it for FREE.

Send Me the Ultimate Bucket List


Koblenz to Luxembourg City by Train

0
Koblenz to Luxembourg by Train

Travelling from Koblenz in Germany to the beautiful Luxembourg City is quite easy, when travelling by train. We caught a direct DB Train from Koblenz Hbf Station to Luxembourg Central Station, and it all went without a hitch. The journey took 2.5 hours in total and was a scenic, comfortable journey.

Note: This post may contain affiliate links. Please read our disclosure policy for more information.

Arriving in Luxembourg City by Train

Arriving in Luxembourg City was a very easy experience, since our hotel was only 8 minutes walk from the Central Train Station. We had booked into the Golden Tulip Hotel Central Molitor, a truly wonderful hotel and highly recommended.

All we needed to do was search our hotel on Google Maps, and walk along the Main Street to get to our hotel. It really could not have been any simpler. Especially since our three.uk sim cards were on roaming and we had internet access all over Europe.

First Day in Luxembourg

Priorities upon arrival were simple. 1. Find some water and basic supplies like fruit and snacks. 2. Have a quick look around. I asked the reception for directions to the nearest convenience store, which solved our first priority.

Then I went for a walk across the bridge to the biggest Cathedral in town to get a small taste of the magnificent scenery in Luxembourg City. This was a teaser, as the next day we would embark on a comprehensive walking tour and take in all the main sights.

Overall Luxembourg Train Experience

The train was a great experience all in all. There was plenty of baggage space on the train to store our large bag. It was easy to find a comfortable second class seat. The train was fast, and there were no connections to worry about.

The overall cost was 83 Euros for 2 adults and 1 child. Whilst this is far from cheap, it is not all that expensive either. I booked these directly on the Deutche Bahn (DB) website. Would I recommend this train trip to other travellers? Yes, absolutely! Trains are definitely a good choice when travelling from Germany to Luxembourg City.

Would you like a free copy of our Ultimate Bucket List?

Not sure where to travel to next? We have created the Ultimate Bucket List to help you plan your next trip. 1170 awesome travel destinations in 167 countries. And we want you to have it for FREE.

Send Me the Ultimate Bucket List


Ehrenbreitstein Fortress Tour Koblenz

0
Koblenz Fortress

Koblenz is a beautiful historic Rhine River city in South West Germany. Koblenz is situated on the intersection of the Mosel River and the Rhine River, and his home to some eye-popping scenery. And the main attraction in town is the Ehrenbreitstein Fortress.

Koblenz is also home to a wonderfully romantic old town area, which is in itself a maze of narrow streets. The old town is also home to heaps of beautiful architecture and some great fountains and statues.

Ehrenbreitstein Fortress Koblenz Walking Tour

In this VLOG we set out for a tour around Ehrenbreitstein Fortress. To get there we take a stroll through the old town area and explore the sights and sounds of Koblenz. We then catch a ride on the cable car across the Rhine River and explore the expansive fortress for some fantastic views over Koblenz, the Rhine River and the Mosel River.

It’s interesting to note that the fortress is also part of the Upper Middle Rhine Unesco World Heritage site.

Duetches Eck in Koblenz

The Duetches Eck is a 37m high statue situated where the Mosel River meets the Rhine River. It is a major landmark which can be clearly seen from the fortress and right and down both rivers. It’s a must see attraction when in Koblenz for some great views of the cable car, the fortress, and the rivers.

Koblenz Attractions in this VLOG

Some of the major landmarks you will see in this VLOG include:

  1. History Statue
  2. Cable Car Koblenz
  3. Ehrenbreitstein Fortress
  4. Duetches Elk
  5. Rhine River
  6. Moselle River

Would you like a free copy of our Ultimate Bucket List?

Not sure where to travel to next? We have created the Ultimate Bucket List to help you plan your next trip. 1170 awesome travel destinations in 167 countries. And we want you to have it for FREE.

Send Me the Ultimate Bucket List

WEATHER

Melbourne
broken clouds
23.1 ° C
24 °
22.2 °
67 %
5.7kmh
75 %
Wed
26 °
Thu
26 °
Fri
26 °
Sat
26 °
Sun
24 °

POPULAR ARTICLES