So you’ve just unboxed a nice new GoPro Hero11 Black, and you’re not sure what settings to use to get the best video? That’s exactly the problem I had. Let me show you the Best GoPro Settings for your Hero11 Black.
Note: This post may contain affiliate links. Please read our disclosure policy for more information.
GoPro Dashboard
You should start by swiping down to access the dashboard, which is used to toggle main features ON/OFF. You are presented with 7 buttons and here are my suggestions:
Voice Control – OFF (Voice control is for later)
Camera Beeps – OFF (Beeps are annoying)
Quick Capture – ON (Use Red Record Button to turn GoPro on and record immediately)
Screen Lock – OFF
Front Screen Settings – FULL SCREEN
Orientation Lock – LOCK to Horizontal Mode
Max Lens Mode Mod – OFF
GoPro Preferences
Access the Video Mode by first swiping down for the Dashboard, then swiping left for the Preference menu.
Video Mode
Set to Highest Quality (default). This will enable you to video in high-quality formats.
Controls
Easy Mode is for Point and Shoot, for those who don’t want to think about settings.
Pro Mode is for those who want to use GoPro Presets and ProTune (see below) for full control. We recommend selecting Pro Mode.
Preferences
Turn GPS OFF, to save your battery.
GoPro Video Presets
These only work if you selected Pro Mode (see above).
To activate presets, click the large oval settings button at the bottom of the screen.
You will see Video Presets for 5 different modes: Standard, Full Frame, Activity, Cinematic, and Slo-Mo presets.
Standard Mode Video Preset
Standard mode is for regular Vlogging type video eg. Travel Vlog.
We recommend you edit your Standard Preset menu as follows, to balance great quality and moderate file sizes.
Aspect Ratio = 16:9 (standard YouTube format)
Video Resolution = 4k (conserves memory space)
Frame Rates = 30 fps (conserves memory space)
Lens (Field of View) = Linear + Horizon Lock
Hyper smooth = Auto boost
Scheduled Capture = Off
Duration = Off (conserves memory space)
Hindsight = Off (conserves memory space)
Timer = Off
GoPro ProTune
The Protune menu appears below the Preset options.
10-Bit Colour = Off (conserves memory space)
Bit Rate = High
Shutter Speed = Auto
EV Comp = 0
White Balance = Auto
ISO Min = Auto
ISO Max = Auto
Sharpness = Medium
Color = Vibrant
RAW Audio = Off
Wind = Auto
Media Mod = Front (Depends on how you are using the GoPro)
GoPro Shortcuts
The Shortcuts options appear below the ProTune options.
You can set personalised on-screen shortcuts for video settings.
4 shortcut buttons can be pre-programmed in the top left, top right, bottom left and bottom right positions.
How you program your shortcuts is a matter of personal preferences, and which accessories you are using. Here’s how I like to set the GoPro Video Shortcuts.
Upper Left = Slo-Mo
Upper Right = Media Mod
Lower Left = 10-Bit
Lower Right = Zoom
Full Frame Video Preset
Full Frame preset uses the 8:7 aspect ratio, so you can later crop to vertical or horizontal, virtually any aspect ratio. But it uses stacks of memory space. Here are my presets:
Aspect Ratio = 8:7
Video Resolution = 5.3k
Frame Rates = 60 fps
Lens (Field of View) = Linear + Horizon Lock
Hyper smooth = Auto boost
Scheduled Capture = Off
Duration = Off
Hindsight = Off
Timer = Off
Protune
10-Bit Colour = On
Bit Rate = High
Shutter Speed = Auto
EV Comp = 0
White Balance = Auto
ISO Min = Auto
ISO Max = Auto
Sharpness = Medium
Color = Vibrant
RAW Audio = Off
Wind = Auto
Media Mod = Front (Depends on how you are using the GoPro)
Shortcuts
Upper Left = Slo-Mo
Upper Right = Media Mod
Lower Left = 10-Bit
Lower Right = Zoom
Activity Video Preset
Activity Preset is for sports, fast action, and lots of movement. Here are my presets:
Aspect Ratio = 16:9
Video Resolution = 4k
Frame Rates = 60 fps
Lens (Field of View) = Linear + Horizon Lock
Hyper smooth = Auto boost
Scheduled Capture = Off
Duration = Off
Hindsight = Off
Timer = Off
Protune
10-Bit Colour = Off
Bit Rate = High
Shutter Speed = Auto
EV Comp = 0
White Balance = Auto
ISO Min = Auto
ISO Max = Auto
Sharpness = Medium
Color = Vibrant
RAW Audio = Off
Media Mod = Front (Depends on how you are using the GoPro)
Wind = Auto
Shortcuts
Hindsight
Schedule Capture
Duration
Media Mod
Cinematic Video Preset
Cinematic is for those Academy Award movie-style videos:
Aspect Ratio = 16:9
Video Resolution = 4k
Frame Rates = 24 fps
Lens (Field of View) = Linear + Horizon Lock
Hyper smooth = Auto boost
Scheduled Capture = Off
Duration = Off
Hindsight = Off
Timer = Off
Protune
10-Bit Colour = Off
Bit Rate = High
Shutter Speed = Auto
EV Comp = 0
White Balance = Auto
ISO Min = Auto
ISO Max = Auto
Sharpness = Medium
Color = Vibrant
RAW Audio = Off
Media Mod = Front (Depends on how you are using the GoPro)
Wind = Auto
Shortcuts
Slo-Mo
Media Mod
10-Bit
Zoom
Ultra Slo-Mo Video Preset
As the name implies this is for Slo-Mo Video:
Aspect Ratio = 16:9
Video Resolution = 4k
Frame Rates = 120 fps (Slo-Mo, not Ultra Slo-Mo)
Lens (Field of View) = Linear + Horizon Lock
Hyper smooth = Auto boost
Scheduled Capture = Off
Duration = Off
Hindsight = Off
Timer = Off
Protune
10-Bit Colour = Off
Bit Rate = High
Shutter Speed = Auto
EV Comp = 0
White Balance = Auto
ISO Min = Auto
ISO Max = Auto
Sharpness = Medium
Color = Vibrant
RAW Audio = Off
Media Mod = Front (Depends on how you are using the GoPro)
Wind = Auto
Shortcuts
Slo-Mo
Media Mod
10-Bit
Zoom
Photo & Time Lapse Settings
Hopefully, you get the idea with Video Settings, so that you may feel confident enough to update Photo and Time Lapse settings. Let us know if you need help with these. Happy GoPro Vlogging 🙂
Not many locals even know about the Eastern Beach Mineral Springs, even though it’s just a stone’s throw from the city center and the iconic Geelong Waterfront. But these wonderful Mineral Springs are one of the Top Things to do in Geelong – and one of the tastiest!
Note: This post may contain affiliate links. Please read our disclosure policy for more information.
A Little Bit of History
Way back in 1882, the Eastern Beach Mineral Springs was discovered by swimmers, who noticed some cool water bubbling out of the cliff base. Word soon got out, and locals were coming in droves to get the special Mineral Water with healing properties – it was said to help with rheumatism, indigestion, and liver complaints.
In 1895 the springs were a popular destination for locals, as the mineral water was well known for its curative properties.
In 1913, the Mineral Springs were fitted with a pipe and concrete block by the Geelong Harbour Trust. The location was about 3m from the shoreline, just below the low tide mark.
In 1959 the Mineral Springs was declared contaminated by seawater, unfit for human consumption, and closed down.
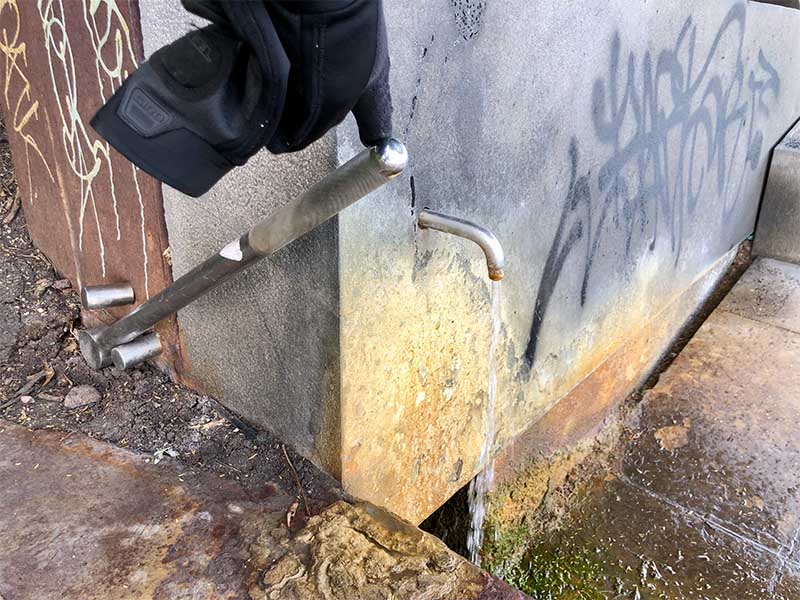
In 1999 the authorities drilled a 35m deep hole to reach the pure underground spring. A hand pump was fitted above the high-tide mark so that locals and visitors can once again enjoy the curative properties of the mineral water.
Turning on the tap for fresh Mineral Water
Quality of the Mineral Water
Eastern Beach Mineral water is natural groundwater with a distinctive taste and effervescence due to the minerals and other particles dissolved in it. So yes, it has bubbles. And yes, it is tasty.
Here is a composition of the Eastern Beach Mineral water according to the sign erected at the site:
Chloride 3500 mg/l
Bicarbonate as CaCO3 1500 mg/l
Sulphate 240 mg/l
Nitrogen – Total TKN + TON 3.0 mg/l
Nitrogen – Nitrate <0.02mmg/l
Total Kjeldahl Nitorgen 2.9 mg/l
Calcium 300 mg/l
Magnesium 180 mg/l
Sodium 2000 mg/l
Potassium 120 mg/l
Iron 5.8 mg/l
Silica SiO2 57 mg/l
Lead <0.02 mg/l
Zinc 0.027 mg/l
Copper <0.085 mg/l
Chromium <0.0007 mg/l
Arsenic 0.005 mg/l
pH 6.2
Total Alkalinity as CaCO3 1500
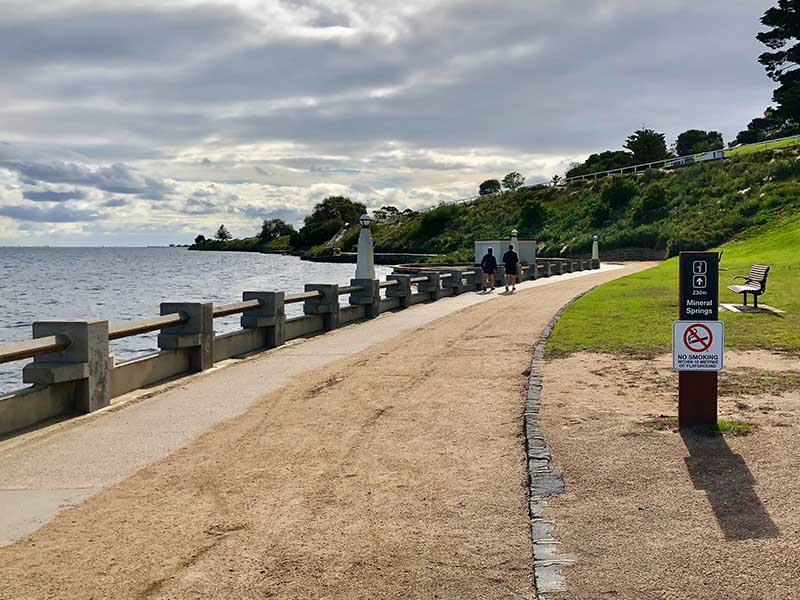
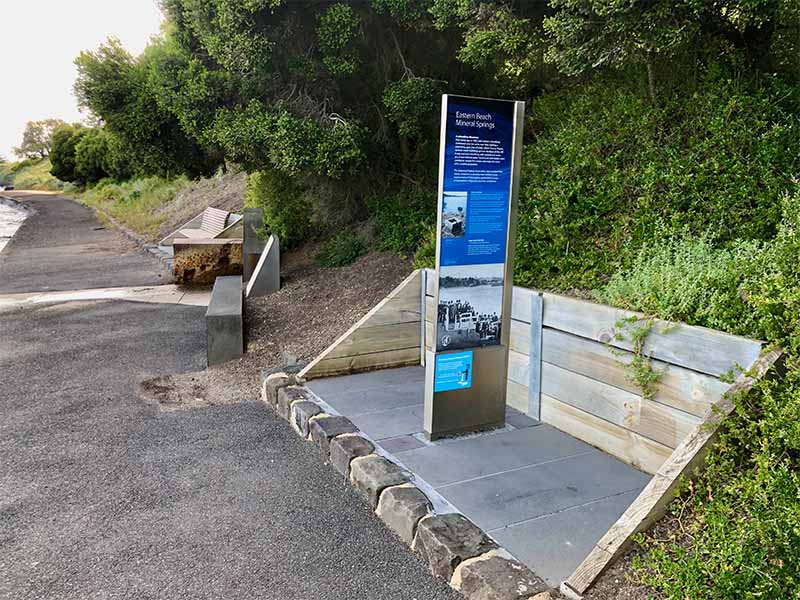
How to Find The Site
From the Eastern Beach Promenade, walk East along the beach walking path (away from the city center). The mineral springs are 230m or a couple of minute’s walk.
From Hearne Parade, walk down the footpath which goes down the side of the cliff face.
Signpost near Eastern Beach Promenade and Playground
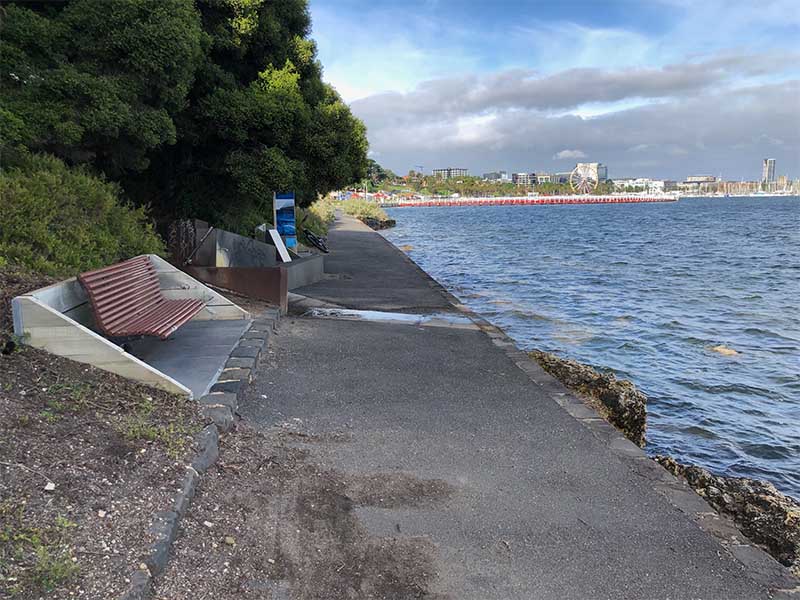
Sit, Relax and Enjoy
There is a lovely park bench with terrific views over Corio Bay. Why not sit, relax and enjoy a couple of drinks of refreshing, tasty Eastern Beach Mineral Water?
A lovely relaxing place to sit with a nice view
Eastern Beach is just a stone’s throw away, check out our blog on Eastern Beach to find out more.
Is it time to upgrade your beloved GoPro Camera yet? We say yes, and here are 11 reasons to Upgrade your GoPro Hero7 Black to GoPro Hero11 Black. You’ll be glad you did!
Note: This post may contain affiliate links. Please read our disclosure policy for more information.
Differences Between GoPro Hero7 and GoPro Hero11 Black
It’s not easy to drop nearly $1000 on a new camera (Australian Dollars). That’s with a couple of genuine accessories thrown in of course.
Especially since the GoPro Hero7 Black, released in September 2018, is still essentially an awesome camera in September 2022 when the GoPro Hero11 Black was released. Let’s look at the main differences that excite me, which can also be seen on the GoPro Comparison chart.
Faster processor – GP2
Better Stablalisation – HyperSmooth 5.0
Horizon Lock
Better Low Light Video
More Megapixels on Photos
5.3k Video
Automatically Update to the Cloud
Better Battery
Better color via 10-bit processing
Creator Pack
Now let’s look at a blow-by-blow account of the reasons I believe it’s time to upgrade your GoPro to the stunning new GoPro Hero11 Black, in order of highest to the least Wow factor.
#1 GoPro Creator Edition
The GoPro Creator Edition has been around for a couple of GoPro versions now, but it was not available in the GoPro Hero7 Black. Basically, the Creator integrates 4 main components:
GoPro Hero11 Black Camera
Media Mod
Light Mod
Volta Hand Grip
Each component included in the creator addition is amazing in its own right, but the most exciting part upgrade for me is the Audio Jack included on the Media Mod. What this means is that finally, you can mount an external microphone directly to your GoPro for amazing audio. No more clumsy adaptors. Yay, about time, GoPro!
#2 Hypersmoooth 5.0 Video Stabilisation
Although the original Hypersmooth released on the GoPro Hero7 Black in 2018 is still amazing after quite a few years, there is no denying that the Hypersmooth 5.0 is incredibly better. Every year hyper smooth video stabilization gets better and better, and after 4 years this difference is significant.
And the auto boost Hypersmooth allows you to set and forget, and let GoPro do all the figuring out on how much stabilization to add.
#3 Horizon Lock
This pairs amazingly well with the Hyper smooth video Stabilization. I have always struggled with keeping the horizon level with the small form factor of the GoPro Action Camera. And leveling in post-processing on the computer is a pain in the butt. Fear not, it’s all automatic now.
#4 Better Battery Life
The new Enduro 1720 mAh battery is a HUGE jump up from the GoPro Hero7 Black battery, which was only around 1240 mAh. But the Volta hand grip is a game-changer.
The Volta gives an extra 4,900 mAh of battery power on top of the Enduro battery. So it is like having 3.8 batteries or probably about 5 times better battery life than the GoPro Hero7 Black. Amazing!
#5 Load Automatically to the Cloud
The last time I subscribed to GoPro Cloud and Quik was about 5 years previously. It was very clunky at the time, and difficult to justify. But loading to the cloud from the GoPro Hero11 Black is automated and has come a long way.
Yes, I am committing to an annual subscription of around $70 Australian per year, however, I believe the value will be definitely there. And my plan is to fully utilize the Quik app on my iPad Pro to produce videos since it has also reportedly come a long way.
No more juggling between the Photos app, iCloud, and dropbox. I’m looking forward to the one-stop-shop approach of GoPro.
#6 Stylish Form Factor
My vlogging setup on the GoPro Hero7 Black was very effective, but not very aesthetically pleasing (check out the feature image). And a bit on the fragile side – it was a homemade vlogging rig after all!
But the stylish form factor of the GoPro Hero11 Black Creator Edition is solid, functional, and stylish. Everything you need, including lights, sound, tripod, and better power are all integrated into one compact vlogging rig.
#7 Colour Grading
I always like a vibrant color grading on my produced videos. Nothing too technical, just vibrant and saturated. This was always an issue with the old GoPro Hero7 color grading, and I also always needed to do some computer color enhancements.
Not anymore, thanks to the new vibrant setting on the GoPro Hero11 Black. I have little doubt that this is greatly assisted by the new 10-bit processing power.
The user interface on the GoPro Hero11 Black is far advanced from the GoPro Hero7 Black and offers a large range of new features. I am excited to work through all the new features available. There is a lot more opportunity now to have auto settings, meaning fewer mistakes.
#9 Volta Control Panel
I love the control panel on the Volta Hand Grip. I love how it’s so simple to use, and how you can stop//start recording, and toggle through the different modes. For me, this is a big deal.
#10 Light Mod & Low Light Video
I have never had a light mod on any of my GoPros. Combined with the more powerful chipset, this gives much more versatility in low-light shooting. Watch out for some GoPro night footage, something which was completely unheard of on the GoPro Hero7 Black.
#11 Easy Charging
A single USB cable will now charge both the Enduro Battery and the Volta battery pack all in a single charge. Now that is convenient! No more juggling around multiple batteries, battery chargers, and cables.
So Much To Love About the GoPro Hero11 Creator Pack
Did I tell you that I’m a big fan of the Creator Pack with the GoPro Hero11 Black? Seriously, this is the action video camera and vlogging camera I’ve been dreaming of for years. There are actually a few more great reasons to upgrade, here are just a few which excite me:
5.3k video
GoPro Hero11 Black reportedly does not freeze like previous GoPro Cameras
The versatility of hot shoes on the Media Mod pack
Much better high-resolution still photos
High-resolution photos from video
Some interesting light effects – starlight, car light trails, light painting
8 x Slow Motion
It’s Time To Upgrade to GoPro Hero11 Black
So have I convinced you to upgrade to the awesome GoPro Hero11 Black Creator Pack yet? There is so much to like, especially when doing a massive upgrade from the GoPro Hero7 Black. And you might even get a good price on eBay for that old GoPro Hero7 Black, because it’s still a great Action Camera!
By the way, check out our guide for recommended GoPro Hero11 Black Accessories. Whether you are doing travel videos or epic action, Happy Action Cam Shooting!
GoPros are amazingly simple to use; you can unbox them and start shooting straight away. But there is one feature that can make a massive difference to your videos, and that is GoPro ProTune. Find out what ProTune can do for you, and what the recommended ProTune settings are.
Note: This post may contain affiliate links. Please read our disclosure policy for more information.
What is ProTune?
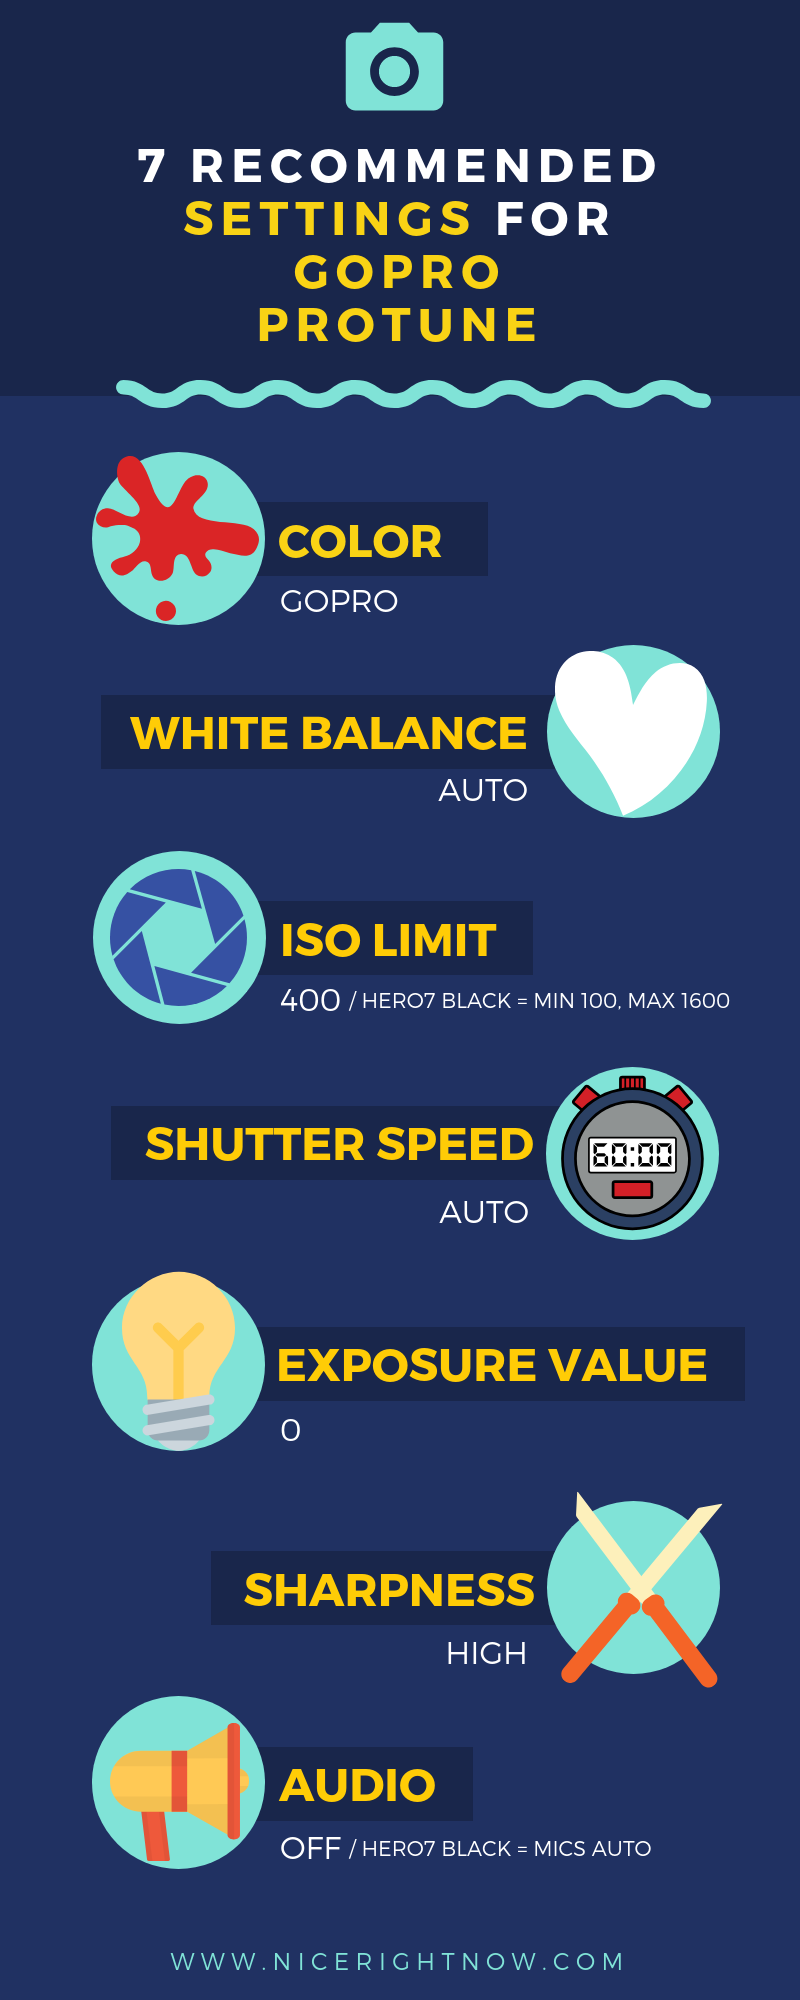
Protune is GoPro’s advanced control for Color, ISO Limit, Sharpness and Exposure. It gives you greater control over the GoPro settings and helps you to take control of your photo or video captures.
What Does ProTune Do?
ProTune for GoPro is intended to be used with editing software to enhance the colours further. Using ProTune makes files easier to edit and results in an overall better final product. That’s because turning ProTune on makes increases the bitrate of your data, making them crisper and sharper.
There is a downside, however – turning ProTune on makes files larger than if ProTune was turned off, due to turning up the bit rate by about 50%. Protune gives more detail to your footage. However, it also increases the file size by about 50%. And this drains your battery faster.
The footage tends to look flat with washed-out colours with ProTune turned on. However, they are much better for enhancing the colours using editing software. Provided that you know how to correct the colours accurately, GoPro will give you a much better final result post-editing.
What if You Leave Protune Turned Off?
With ProTune turned off, the colour profile defaults to GoPro (refer ProTune settings below). GoPro colour profile will deliver great colour which is suitable for sharing straight away, as there is little doubt that the default GoPro image quality is excellent. GoPro does a great job at delivering awesome quality videos with ProTune turned off.
I prefer to saturate the GoPro image a little further using editing software, Final Cut Pro X in my case. That’s a case of personal preference, like how much saturation you want to apply to your videos. For basic vlogging, it would be perfectly fine to leave ProTune turned off.
It comes down to this.
Leave ProTune OFF if you want to point and shoot, and care little about controlling camera settings.
Turn ProTune ON if you want to have some control over your camera settings, and maybe tweak things as you go.
What Protune Settings are Available?
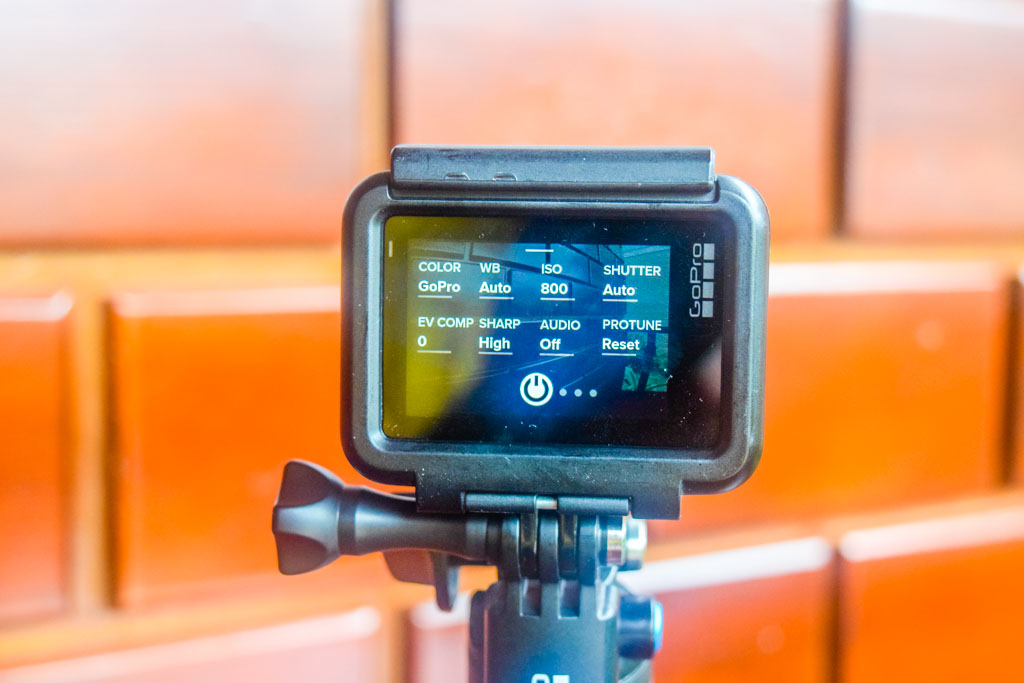
ProTune Settings on GoPro Hero5 Black & Hero6 Black
Here are the settings which can be adjusted when ProTune is turned on. The default settings on the GoPro HERO5 are in bold text.
EV COMP (Exposure Value Compensation) : 2.0, 1,5, 1.0, 0.5, 0, -0.5, -1.0, -1.5, -2.0
SHARP (Sharpness): High, Medium, Low
AUDIO: OFF, Low, Medium, High
PROTUNE RESET
ProTune Settings on the Hero5 Black
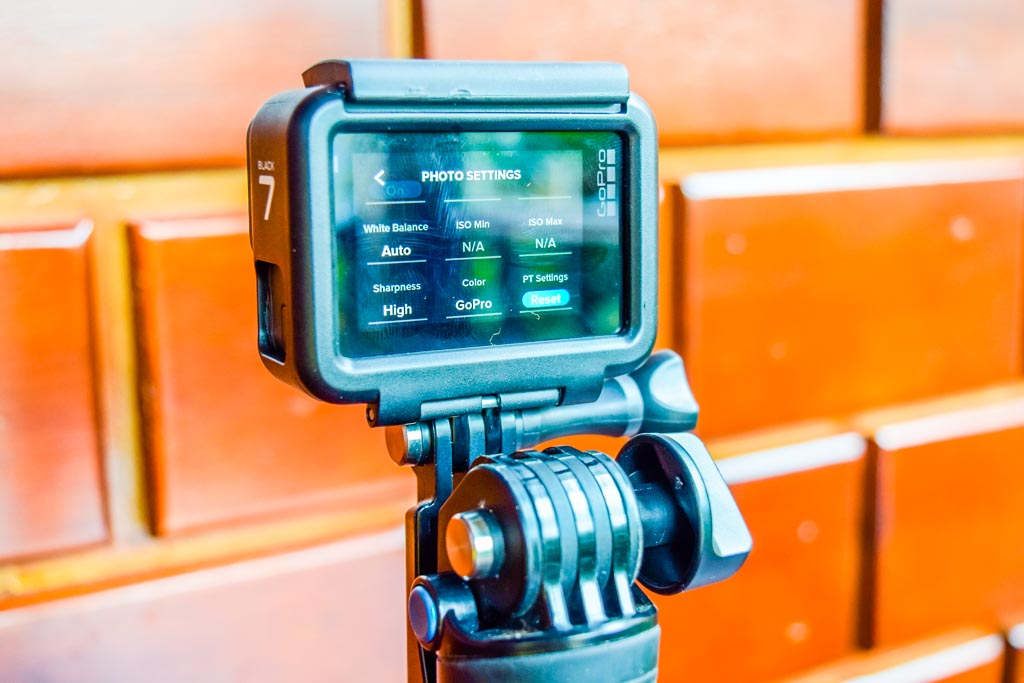
ProTune Settings on GoPro Hero7 Black
Here are the settings which can be adjusted when ProTune is turned on. There are two other ProTune Settings on the GoPro Hero7: Black ISO Max and Microphones. The default settings on the GoPro HERO7 Black are in bold text.
EV COMP (Exposure Value Compensation) : 2.0, 1,5, 1.0, 0.5, 0, -0.5, -1.0, -1.5, -2.0
SHARPNESS: High, Medium, Low
RAW AUDIO: OFF, Low, Medium, High
MICS: Auto, Wind, Stereo,
PROTUNE SETTINGS RESET
Protune Settings on Hero7 Black
ProTune Settings on GoPro Hero11 Black
Here are the settings which can be adjusted when ProTune is turned on. Note: You will have to set GoPro Controls to Pro Mode to enable ProTune. Refer to our blog post on Best GoPro Setting for GoPro Hero11 Black for more information.
The default settings on the GoPro HERO11 Black are in bold text.
EV COMP (Exposure Value Compensation) : 2.0, 1,5, 1.0, 0.5, 0, -0.5, -1.0, -1.5, -2.0
SHARPNESS: High, Medium, Low
RAW AUDIO: OFF, Low, Medium, High
WIND NOISE REDUCTION: Auto, On, Off
MEDIA MOD = GoPro, Front, Back
PROTUNE SETTINGS RESET
How to Adjust ProTune Settings
How to Adjust ProTune – GoPro Hero5 Black
First swipe left, starting from the right-hand side of the screen.
Secondly, you will see the full ProTune menu. Now you can adjust all the ProTune settings.
How to Turn ProTune Off – GoPro Hero5 Black
First swipe left, starting from the right-hand side of the screen.
Secondly, toggle the ON/OFF button at the bottom of the screen to OFF.
How to Turn ProTune On – GoPro Hero5 Black
From the Video Mode screen, touch the information box in the centre of the bottom of the rear display screen.
Secondly, toggle the Protune ON/OFF button at the bottom of the screen to ON.
Protune ON/OFF on the Hero5 Black
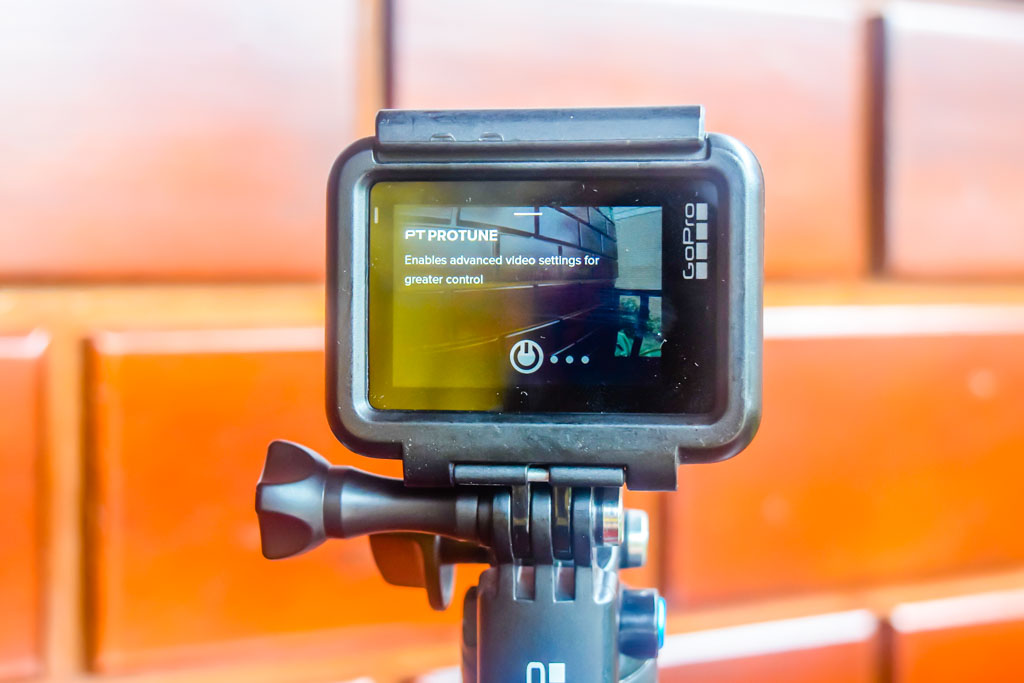
How to Adjust ProTune – GoPro Hero7 Black
From the Video Mode screen, touch the information box in the centre of the bottom of the rear touch screen.
When ProTune is toggled ON, scroll down on the rear touch screen, and you will see all the Protune Settings available for making adjustments.
How to Turn ProTune Off – GoPro Hero7 Black
From the Video Mode screen, touch the information box in the centre of the bottom of the rear display screen.
Secondly, toggle the Protune ON/OFF button at the bottom of the screen to OFF.
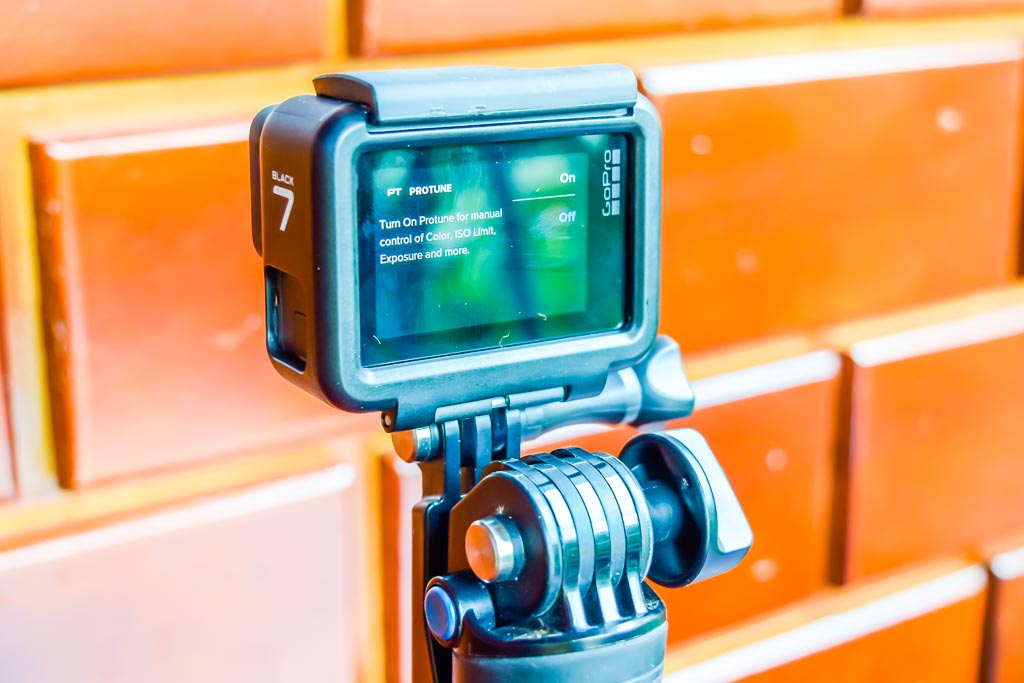
How to Turn ProTune On – GoPro Hero7 Black
From the Video Mode screen, touch the information box in the centre of the bottom of the rear display screen.
Secondly, toggle the Protune ON/OFF button at the bottom of the screen to ON.
ProTune On/Off setting on Hero7 Black
How to Adjust ProTune – GoPro Hero11 Black
From the Video Mode screen, swipe downto access the dashboard.
Swipe left for the Preference menu.
How to Turn ProTune Off – GoPro Hero11 Black
From the Video Mode screen, swipe downto access the dashboard.
Select Controls = Easy Mode to turn Protune OFF.
How to Turn ProTune On – GoPro Hero11 Black
From the Video Mode screen, swipe downto access the dashboard.
Select Controls = Pro Mode to turn Protune ON.
Recommended GoPro ProTune Settings
It all comes down to personal taste and how much editing you intend to do. Here is a video showing you how each setting adjustment looks on the ProTune image.
Most of the clips in this video are in the raw mode, meaning they have not changed at all using editing software. However, the last two clips have been edited using Final Cut Pro X, to show you the difference this can make to the resulting image, without getting too technical.
You can see in these two clips that the colour changed by increasing the saturation to 60%, thus giving more intense colour in the post-production video. This is of course to personal taste, I like saturated colour.
10-Bit Colour
10-Bit Colour is a new feature for the GoPro Hero11 Black and can display over 1 billion colours for enhanced colour depth. Turn this setting on to save your videos in the 10-bit HEVC format.
I recommend you set 10-Bit to OFF if you are looking to conserve file sizes. 10-Bit colour will consume more storage space.
Bit Rate
Bit rate determines the amount of data used to record a second of video. Choose between standard or high. A high bit rate gives you optimal image quality.
I recommend you set the Bit Rate to High.
Colour:
Options: GoPro/Flat (GoPro Hero7 Black) or Natural/Vibrant/Flat (GoPro Hero11 Black)
Flat is similar to using RAW files on DSLR cameras. It looks flat straight out of the camera, but the images files retain all the information for editing. The flat format is more compatible with editing software and can come up better looking after editing.
GoPro/Vibrant setting gives you a more vibrant and saturated-looking shot. Note that the GoPro/Vibrant option gives you the same colour profile as if the Protune is turned off.
I prefer to use the GoPro option (Hero7 Black) or the Vibrant option (Hero11 Black), which I further enhance with editing software. I use Final Cut Pro X and may further adjust the saturation up to about 60%. Although these are not the most authentic representation of the colours, I find that these videos pop with vibrant colours.
White Balance
Options: Auto / 3000K, 4000K, 4800K, 5500K, 6000K, 6500K, Native (where K refers to Kelvin).
White Balance will adjust the colours and tones in your shot, according to the shadows and highlights visible. I prefer to leave this on Auto.
If you do want to adjust:
3000K is a warm light. Examples are indoors under incandescent lighting or sunrise/sunset conditions.
5500K is slightly cold light. Examples are indoors under cool fluorescent lighting or average outdoor lighting conditions.
6500K is for cold light. An example is an overcast day outdoors.
I leave this on 0, it is quite easy to open Protune EV to adjust to a brighter or duller image for different light conditions. Normally adjustments +/- 0.5 will be sufficient.
I leave this on the default Medium so the images are not too crisp, or sharp images, which can give the videos an unnatural harsh edge. Alternatively, you can get an even softer image by adjusting sharpness to Low. Sharpness can then be easily adjusted either way using editing software.
RAW Audio:
Options: OFF, Low, Medium, High
I leave this set to OFF. It’s hard to find information on Protune Audio; it’s not on the GoPro Protune website. I’ve read elsewhere that it’s only useful for post-recording audio editing, which I do not bother with. If you turn it on, you will get a separate audio file.
Wind
A new feature on GoPro Hero11 Black is the wind noise feature. I prefer to leave this on Auto.
Summary of Recommended Settings:
I recommend you turn ProTune ON, and use the below settings as standard. You may wish to adjust EV COMP from time to time, but that’s the only adjustment necessary.
10-Bit Colour = Off
Bit Rate = High
Shutter Speed = Auto
EV Comp = 0
White Balance = Auto
ISO Min = Auto
ISO Max = Auto
Sharpness = Medium
Color = Vibrant
RAW Audio = Off
Wind = Auto
Media Mod = Front (Depends on how you are using the GoPro)
GoPro Hero5 Black Touch Display showing ProTune OFF (No PT icon on the right side)
Which GoPro Cameras use ProTune?
Protune became available with the GoPro HERO3. However, it was for videos only. Then with the HERO4, 5 and 6 Protune became available for both photos and videos. Here is a list by of each GoPro model which includes ProTune, which is one of the Registered Trademarks of GoPro.
Hero11 Black
Hero10 Black
Hero9 Black
Hero 8 Black
GoPro Max
Hero 7 Black
Fusion
Hero6
Hero5
Hero4 Session (Protune for Hero4 Session video and photos)
Hero4 Silver (Protune for Hero4 Silver video and pictures)
Hero4 Black (Protune for Hero4 Black video and images)
Hero3+ (Protune for GoPro Hero3+ Silver video only)
Hero3 Silver (Protune for GoPro Hero3 Silver video only)
Hero3 Black (Hero3 ProTune for GoPro Hero3 Black video only)
Final Say on ProTune
Whether you decide to turn on Protune on GoPro or leave it off is a matter of how much time you want to invest in post-production software editing. And how much you want to have the absolute best video possible, which is using ProTune.
In reality, I like to spend more time outdoors amongst the action, especially when I’m out capturing travel videos — less time in the editing room. At the end of the day, it all comes down to personal preferences.
Would you like a free copy of our Ultimate Bucket List?
Not sure where to travel to next? We have created the Ultimate Bucket List to help you plan your next trip — 1170 excellent travel destinations in 167 countries. And we want you to have it for FREE.
Geelong has been known for years as Sleepy Hollow because it was thought that nothing really happens in Geelong. But that is changing, now there is heaps of awesome stuff to see in Geelong. We’ll show you the Top Things to do in Geelong.
Note: This post may contain affiliate links. Please read our disclosure policy for more information.
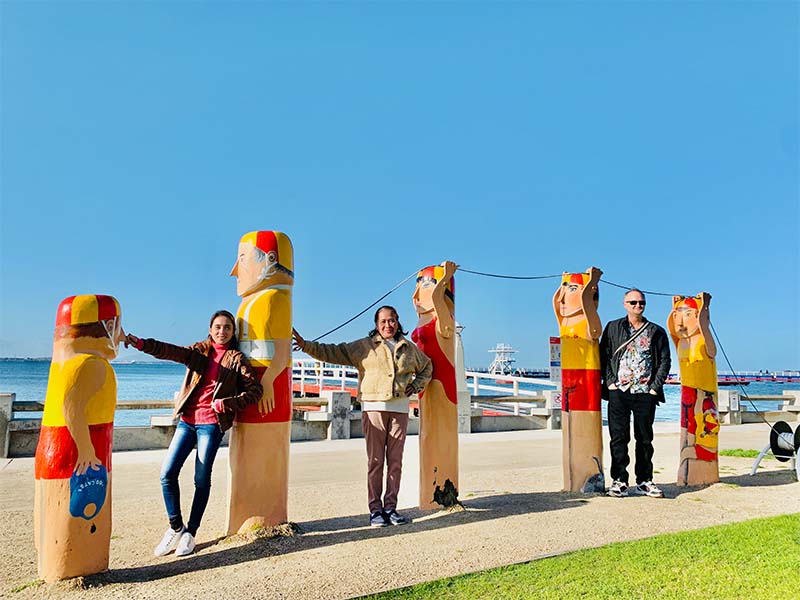
Bollards have become an iconic symbol of the Geelong Waterfront. And the Geelong Bollard Trail Walk is such a fun activity for kids and grown-ups alike.
There are 48 sites containing a total of over 100 Bollards. The walk starts from Limeburners Point and finishes at Rippleside Park, and will take you about 2 hours each way. Allow more time for the 100+ photos you will want to take 🙂
Eastern Beach is probably the most famous thing to do in Geelong. It is right next to the city center, so you can’t really visit Geelong without visiting Eastern Beach. But Eastern Beach is not just a beach, in fact, it is a whole precinct. Here are some of the many things you can do at Eastern Beach:
The Eastern Beach Mineral Springs is about 300m beyond the Eastern Beach Playground. Here you can get bubbly, tasty Mineral Water from a 35m deep mineral spring. You can also access them from Hearne Parade.
The mineral springs have been around since around 1895 and the mineral water is well known for its curative properties – it is thought to improve rheumatism, indigestion, and liver problems!
Back in 1851 the Government was smart enough to set aside 200 acres of prime bay frontage land for the Geelong Botanic Gardens and Eastern Park. Nowadays the Botanic Gardens have been transformed into a relaxing garden setting and an importnt conseration area.
Located on Podbury Drive Geelong, Geelong Botanic Gardens are open 365 days a year from 8am to 5pm (7pm during daylight savings), and is free entry.
Some of the amazing attractions of the Botanic Gardens include:
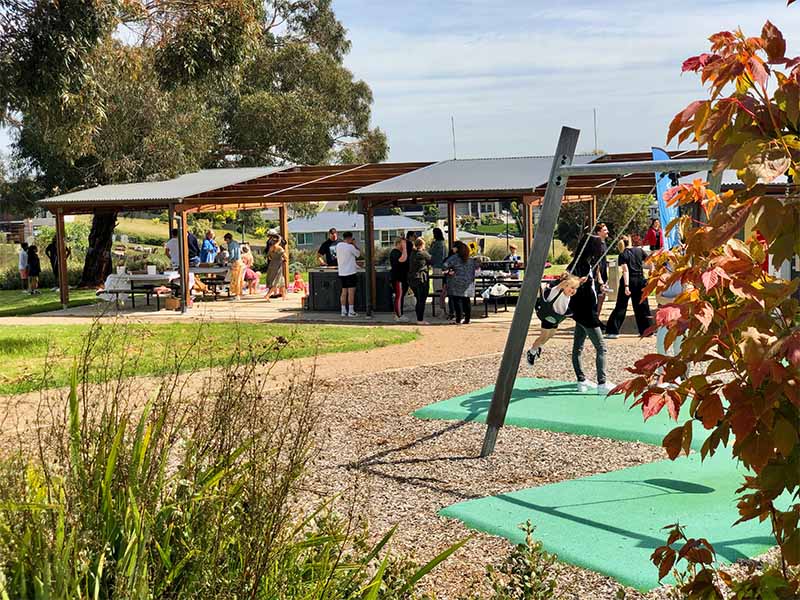
If you want to get a bird’s eye view of Geelong, check out the Wandana Heights Lookout. The lookout itself is about 8km from Geelong City Centre in a leafy suburb called Wandana Heights.
At Wandana Heights Lookout you can climb the stairs to the lookout, then have a picnic in Drewan Park which joins the Lookout car park. Drewan Park has free electric barbecues, playground equipment, and some terrific views of Geelong.
Serendip Sanctuary is a wildlife reserve where you can see Kangaroos, Wallabies, Emu’s and a huge variety of birdlife. There is also loads of wetlands and walking trails. One of the best features is the free barbecues, together with toilets and drinking water fountain.
Serendip Sanctuary is located at 100 Windamere Road, Lara. It’s about a 20km drive from Geelong City Centre. Alternatively, you could catch the train to Lara Station, and from there it’s about a 50 minute walk (or catch an Uber/Taxi).
Unfortunately when we visited in 2022 most of the wildlife had been removed by the Goverment authorities. We are unsure if they will return anytime soon. We say it is worth a visit to take in the wetlands and abundant natural birdlife.
Photo of the Day: A tawny frogmouth in Serendip Sanctuary, in Victoria, in Australia, by Deepak Karra.
Probably the most loved event on the Geelong Calendar, this is a festival of epic car shows and epic quarter-mile racing along the iconic Geelong waterfront.
The 2022 event was held from 25th to 27th November, however, you should consult the official website to check future dates. Mark your calendar, this is not to be missed!
As you can see there are loads of Geelong Attractions to keep you busy when visiting Geelong. And the list of Geelong Attractions is growing every year. Visit Geelong today, check out our Geelong Travel Guide, and enjoy the Top Things to Do in Geelong 🙂
Geelong is not well known for zoos. However, there is a great Wildlife Sanctuary just 20km out of town. So if you are wondering What to do in Geelong – consider a visit to Serendip Sanctuary in Lara.
Note: This post may contain affiliate links. Please read our disclosure policy for more information.
History of Serendip Sanctuary
Since European settlement in the 1880’s the land was turned into farming land. Prior to farming, the country was native grassland, wetlands, and grassy woodlands. But farming wiped out this natural habitat, and then the native wildlife disappeared.
In the 1950s the property became public land, and since then the habitat has been re-created, and the animal species slowly returned. The variety of animal species increased from about 40 to over 150 during this time, and now the sanctuary is an important conservation area.
Rainbow lorikeet (Trichoglossus moluccanus), Serendip Sanctuary, Lara, 60km SW of Melbourne, Australia #ownpicpic.twitter.com/09R6jT2cb2
— ParrotOfTheDay (Insta) | @parrotoftheday@ecoevo 🐘 (@ParrotOfTheDay) November 20, 2021
How To Get To Serendip Sanctuary
The Location of Serendip Sanctuary is 100 Windamere Road, Lara. This is about a 20km drive from central Geelong and there is free parking on site.
Public transport is limited. You can catch the train from Geelong Station to Lara Station, from there it is about a 50-minute walk to Serendip Sanctuary. The walk is easy with no hills. Alternatively, you could get a taxi or Uber from Lara train station, which will cost around $13 each way for Uber.
Did you know an emu is the world's second tallest bird? This one was 📷 at our forest in Serendip Sanctuary in Lara, Victoria. In 2009, we planted 31,000 native trees here to increase biodiversity and build habitat for 150 species of birds that visit the sanctuary. #GrowingHopepic.twitter.com/Hk6ac775vX
Parking is free and there is heaps of parking available at the Serendip Sanctuary Car Park
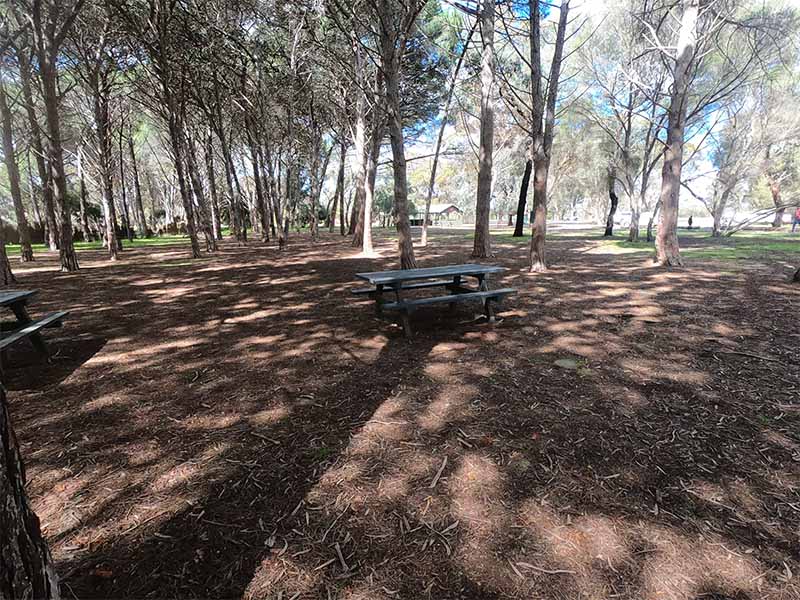
We love the free barbecues at Serendip Sanctuary. There are about 6 barbecues so it is unlikely that they will all be busy. There are rain shelters and loads of picnic tables, and heaps of space for the kids to run around.
There is a large toilet block at Serendip Sanctuary, and these have been spotless clean every time we visited. There is also a water fountain where you can fill your water bottles with drinking water.
Note that no rubbish bins are provided, you are expected to take your rubbish with you when you leave.
Part of the expansive picnic area
Entry to Serendip Sanctuary
We love the fact that as of 2022, Entry is FREE 🙂
Serendip Sanctuary is open every day from 8.00 am-4.00 pm, but is closed on Christmas Day and Good Friday.
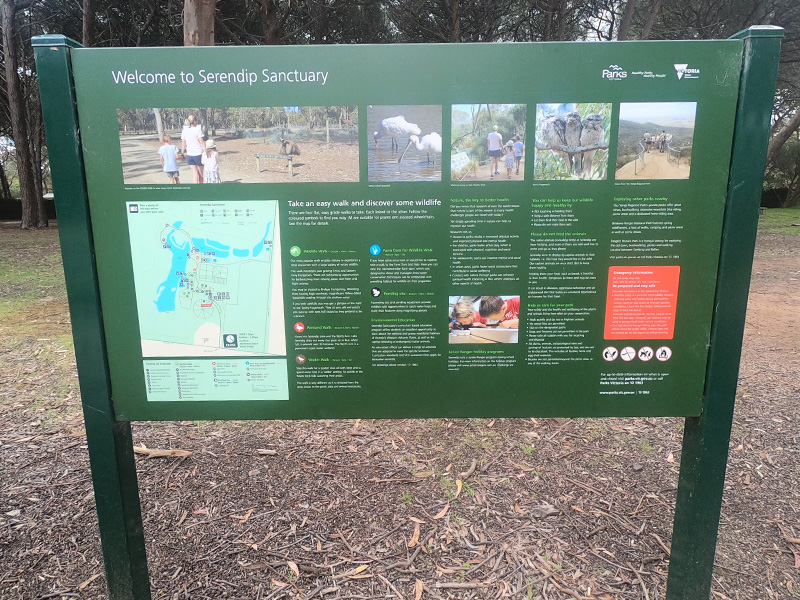
Downloads – Visitors Guide and Map
You can download a handy visitors guide and map on the Parks Victoria Website. Look for the links at the bottom.
Plenty of handy maps can be found on site
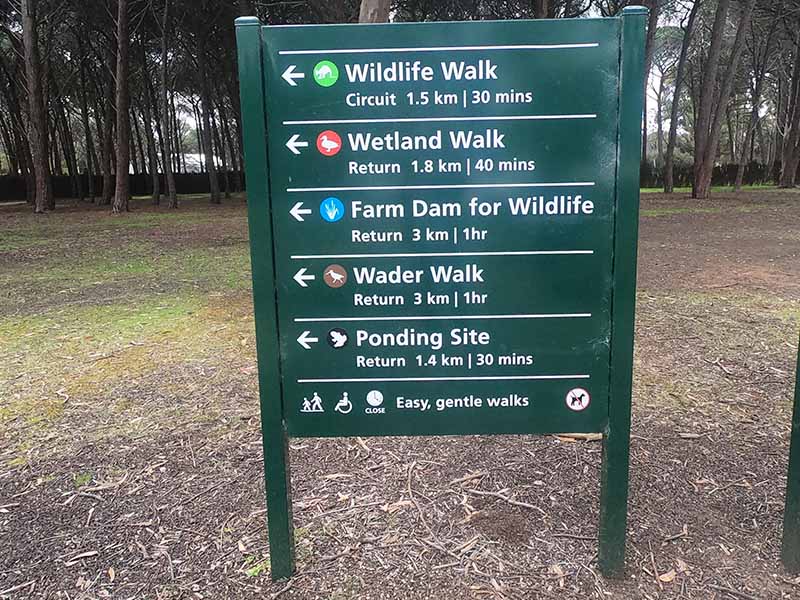
What To Do At Serendip Sanctuary
There are 4 main walks at Serendip Sanctuary – each has its own distinct habitat and theme.
Wildlife Walk (1.5 km) – Kangaroos, Wallabies, and Emus. Also bird hides and bird enclosures.
Wetland Walk (1.8 km) – Lake views, observation tower and bird hides.
Farm Dam for Wildlife Walk (3 km) – Farm dam bird observation hide.
Wader Walk (3 km) – Wader bird observation hide.
As you can see bird hides are a major theme at Serendip Sanctuary. A good pair of binoculars is well worth the trouble for bird-watching.
Don’t forget good walking shoes!
Where Did the Wildlife Go?
Unfortunately politics has come to Serendip Sanctuary, with the Labor Party promising to spend $11 million to upgrade the Sanctuary. It seems that the Victorian Government has been busy removing wildlife and removing enclosures in 2022. Locals don’t understand why this removal is happening, but we hope it is part of the promised upgrade.
Check Out The Wildlife
So when you’re deciding what to do in Geelong, why not check out some truly local wildlife and visit Serendip Sanctuary.
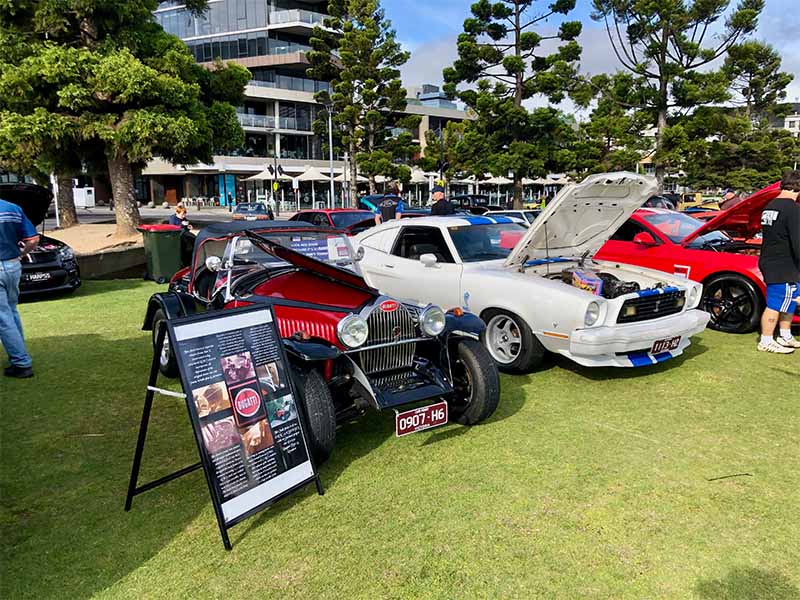
Every year in Geelong there is a 3-day motoring festival called the Geelong Revival Motoring Festival. There is car racing along the iconic Eastern Beach Foreshore, car shows, and loads of family activities. This is without a doubt one of the best things to do in Geelong, and well worth adding to your calendar!
A lovely Bugati in the car show
Note: This post may contain affiliate links. Please read our disclosure policy for more information.
History of the Event
Speed trials began on the Geelong Waterfront in 1956. This became a favorite event for Geelong for over 50 years. But then it stopped.
In 2012 the event was relaunched as Geelong Revival Motoring Festival and has been one of the top attractions in Geelong ever since.
When and Where is the Geelong Revival Motoring Festival
In 2022 the Geelong Revival dates were November 25th to November 27th. You should check the Official Website to find out the dates of the next one.
The location is Geelong Waterfront, and it is actually spread out from the Carousel and Steam Packet Gardens, all the way up to Eastern Beach.
The location of the Quarter Mile Sprints is Ritchie Boulevard, which is the main car park along Eastern Beach Foreshore.
The good news is that you can enjoy the car show and loads of activities for free. Just head along Steampacket Gardens and Eastern Beach on the Geelong Waterfront.
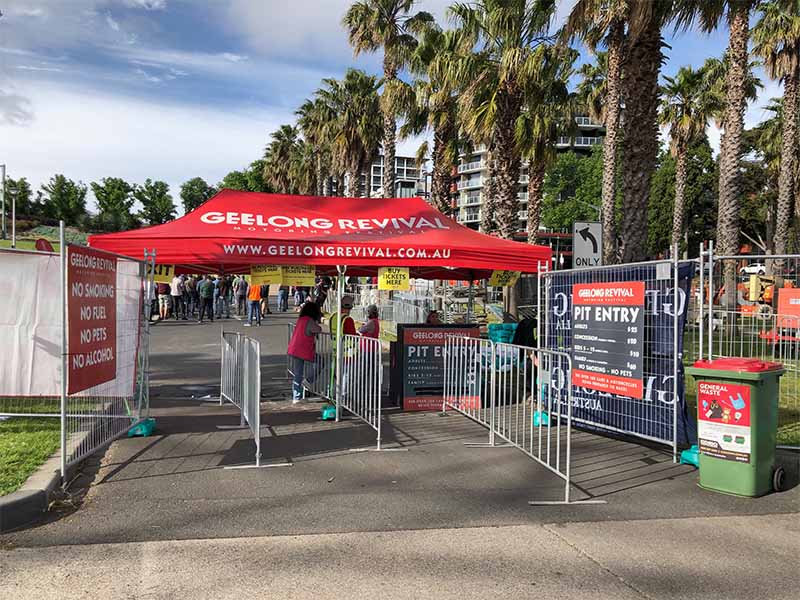
Pit entry will cost you a little more. You will need this pass to enjoy the full adrenaline rush over 100 cars being prepared for racing.
2022 event prices were as follows for Pit Entry:
$25 Adults
$20 Concession
$10 Kids 5-12 years old
$60 Family 2 adults 2 kids
Take A Walk Through Geelong Revival Motoring Festival
Here is a little walk-through to whet your appetite. See you at the next Geelong Revival Motoring Festival!
Eastern Beach is the Number 1 attraction in Geelong. After all, it is a stone’s throw from the city center. So when looking for Things to Do in Geelong – Eastern Beach can’t be overlooked.
Note: This post may contain affiliate links. Please read our disclosure policy for more information.
How to get to Eastern Beach
It doesn’t matter where you are in the Geelong city center, it’s a short stroll to Eastern Beach. Just walk North from anywhere in the city and you will run into Eastern Beach (or close to it). If you are driving, there is loads of parking. Parking is generally free after 5:30 pm, but most parking has parking meters which can become quite expensive.
People-watching and fitness boot camps are probably the most popular things to do at Eastern Beach. But there are loads of other activities, here are just a few.
There are several free electric Barbecues on the eastern beach lawns. These are often the location for large family gatherings, especially on sunny weekend days and public holidays. But it’s normally not too difficult to find a vacant barbecue.
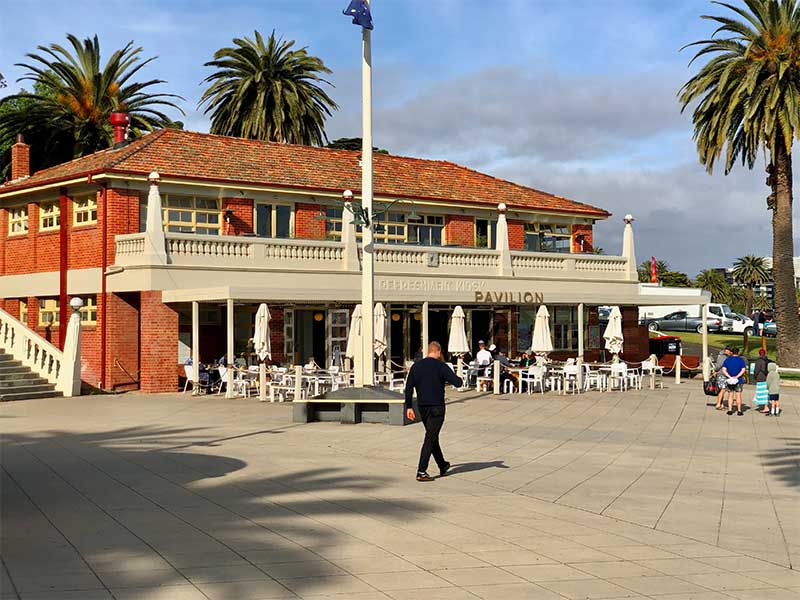
Pavillion Cafe
This is a favorite during summer when ice creams and icy poles are absolute favorites. But the Pavillion Cafe is also an ideal spot to have a nice cuppa and a chat.
The lovely Pavillion eatery
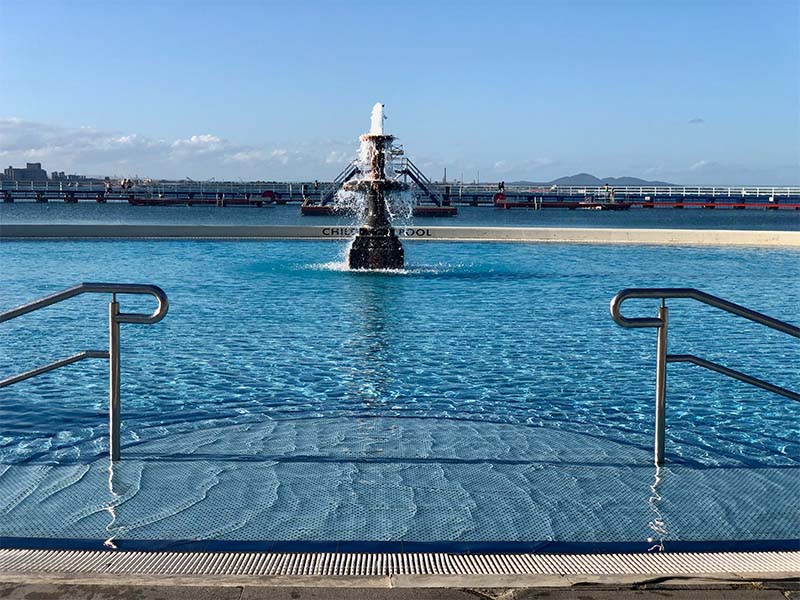
Eastern Beach Children’s Pool
The Childen’s Pool is filled with fresh seawater and comes complete with a picturesque water fountain. With shallow parts for small kids, the Eastern Beach Children’s Pool gets very busy on a hot summer day.
Eastern Beach Children’s Pool is very inviting
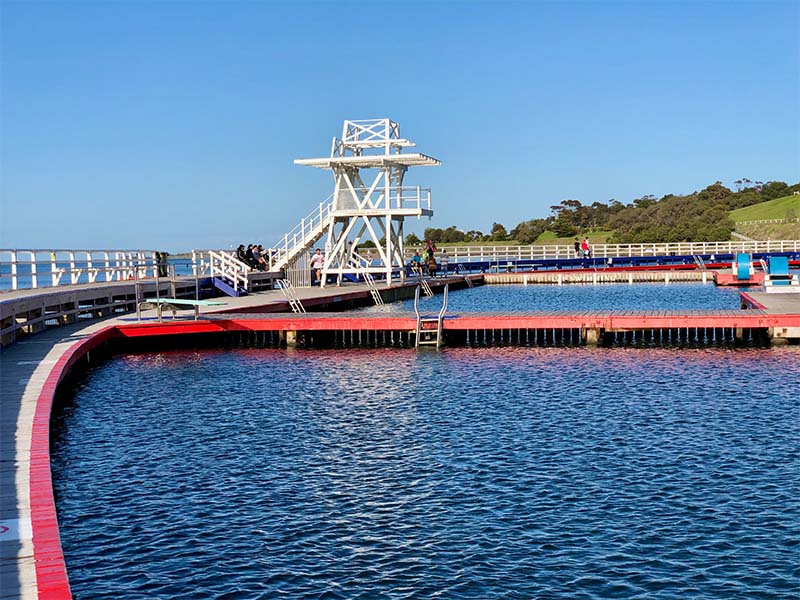
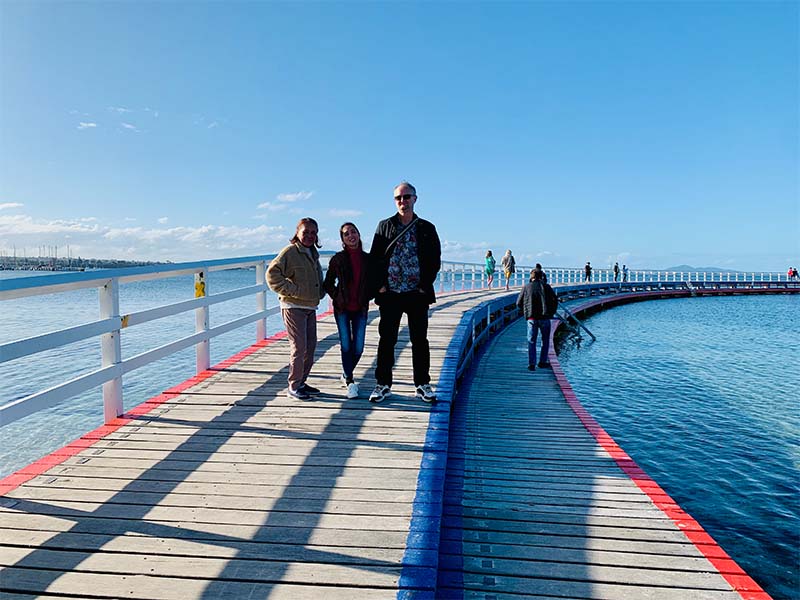
Eastern Beach Promenade
The Promenade is the #1 attraction at Eastern Beach. This is a large boardwalk that also houses a shark-proof cage for safe swimming. The swimming area inside has a variety of diving platforms, diving boards, and fun rollers.
You will see middle-aged gentlemen swimming inside the Eastern Beach Promenade every day of the year, it has become somewhat of a religion amongst the locals!
Walking along the Promenade Board Walk
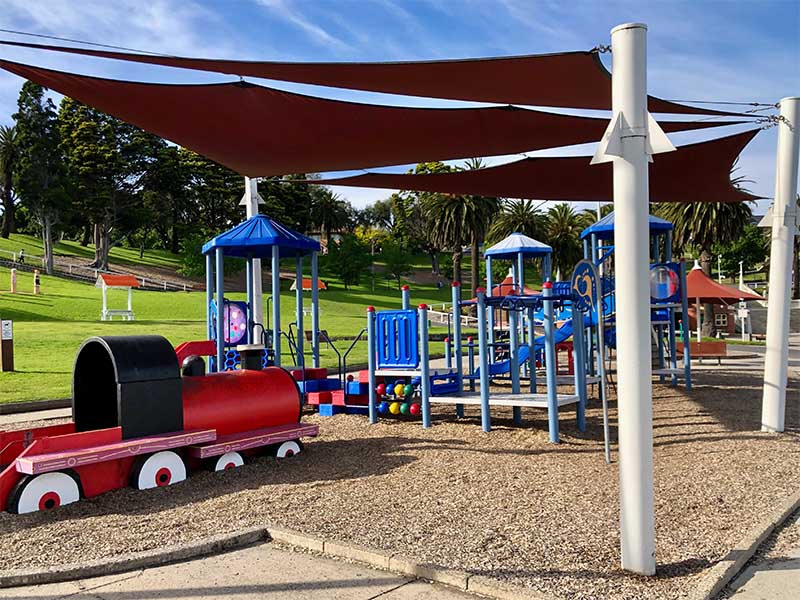
Eastern Beach Playground
The Children’s Playground at Eastern Beach is one of the best in the area. The variety of play equipment is staggering for kids between about 2 and 10 years old. And there is some wonderful seating areas for the parents to lazily wait for the kids to get bored, which is likely to take most of the day!
The playground has lots of shade
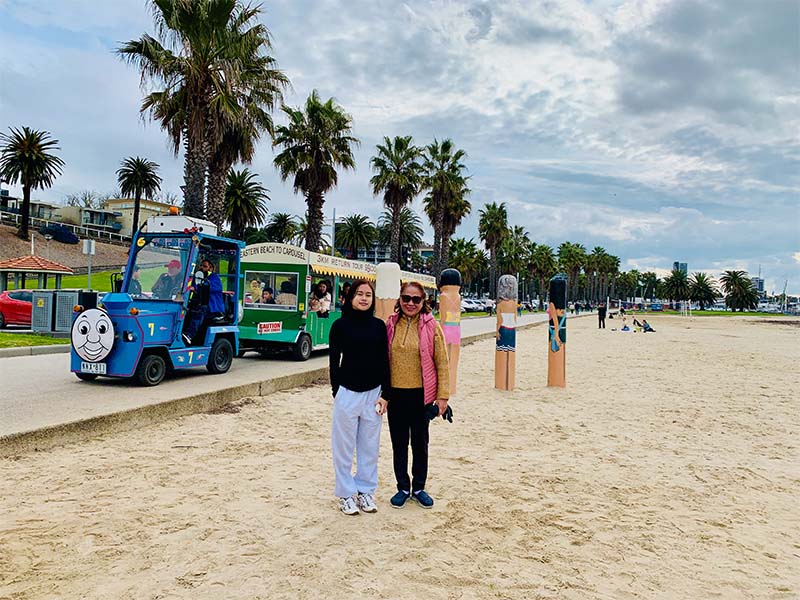
Eastern Beach Train Tour
The Thomas the Tank Engine tour is somewhat of a legend in these parts. The Children’s train weaves its way through the Eastern Beach area, all the way along the other parts of the waterfront. Rides are about $8 and run continuously on most days. Just look for one of the many sign-posted stops and pay the driver.
The Children’s Train drives past Eastern Beach
Stroll Along The Sandy Beach
No trip to Eastern Beach is complete without a stroll along the lovely white sandy beach. It’s a great spot for a photo with Geelong Yacht Club in the background.
Play Volley Ball on Eastern Beach
There are 2 beach volleyball nets permanently set up about halfway along the white sandy Eastern Beach. The sand is fine and expansive, just perfect for beach volleyball. So pack an esky, a few friends and a volleyball if you can.
Beach Volleyball – Just add Balls!
Gelati Anyone?
There is usually a Gelati van parked at both ends of Eastern Beach. They also sell soft serve and regular ice cream, but they are best known for their large range of delicious Gelati treats.
Gelati Van at Eastern Beach
Bollard Trail Walk
As you stroll along Eastern Beach, you will definitely notice several colorful bollards. These are iconic around Geelong, and there are well over 100 of them along the waterfront alone. These are the most instagrammable features along the Eastern Beach area for sure.
Some of the colorful Bollards at Eastern Beach
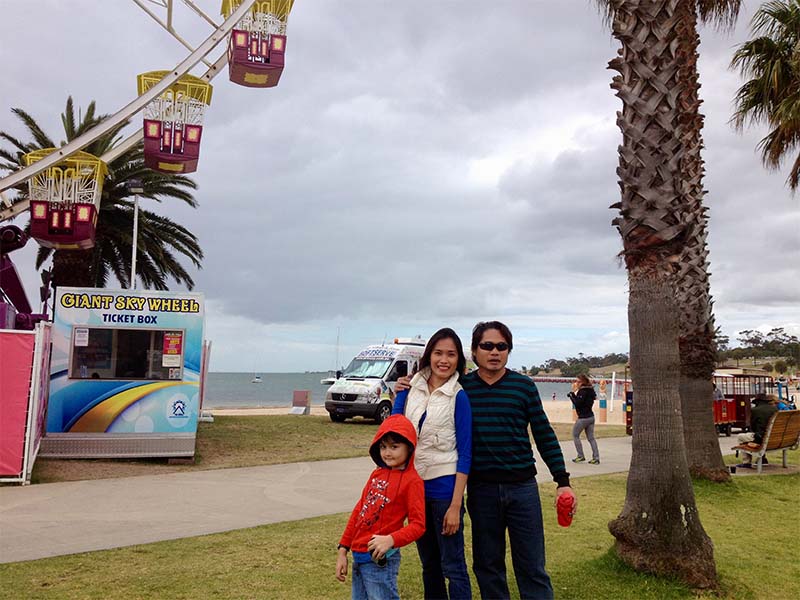
The Giant Skywheel
The Giant Skywheel comes and goes, but you will normally see it set up at the Eastern end of Eastern Beach. They run into the evening, and around sunset is probably the best time to enjoy the Giant Skywheel.
The Giant Sky Wheel at Eastern Beach
Eastern Beach Mineral Spring
Right up at the western end of the beach, past the promenade, you will find the historic site of the Eastern Beach Mineral Spring. Not really a big tourist attraction, it’s well worth a look for the more curious among you.
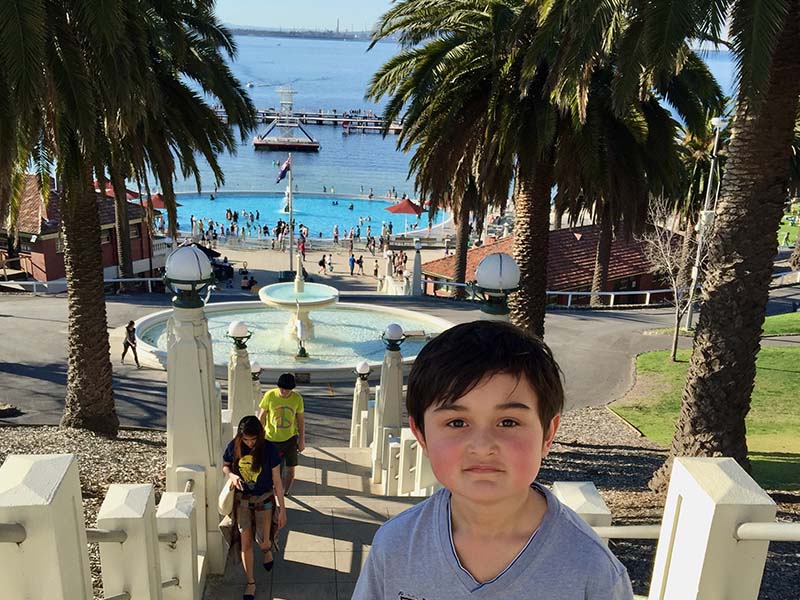
The Big Fountain
Above the Pavillion Cafe is a large picturesque water fountain. This is a fantastic spot for a family photo on a warm summer day, as you will see the entire promenade area in the background. This is the postcard shot you will often see of Eastern Beach.
The Big Fountain at the top above the Children’s Pool
Enjoy Eastern Beach Geelong
As you can see there is so much to see and do around the Eastern Beach precinct of Geelong. It is quite easy to spend 3-4 hours wandering around enjoying the sites. When you’re finished with that, check out our full list of Things to Do in Geelong, where you will find loads of other interesting attractions.
If you want to get a bird’s eye view of Geelong, you can’t miss the Wandana Heights Lookout. It is one of the more unique things to do in Geelong, offering stunning views of the Greater Geelong region.
Note: This post may contain affiliate links. Please read our disclosure policy for more information.
What’s So Special About Wandana Heights Lookout
Geelong has a small mountain range running through part of it. And this lookout is one the best Geelong Attractions that offers panoramic views of Geelong City Centre, Corio Bay, and all the way across to Torquay and the Bass Straight. It’s not a particularly well-known tourist attraction, however, if you want to see all of Geelong laid out before you this is the best place to see it.
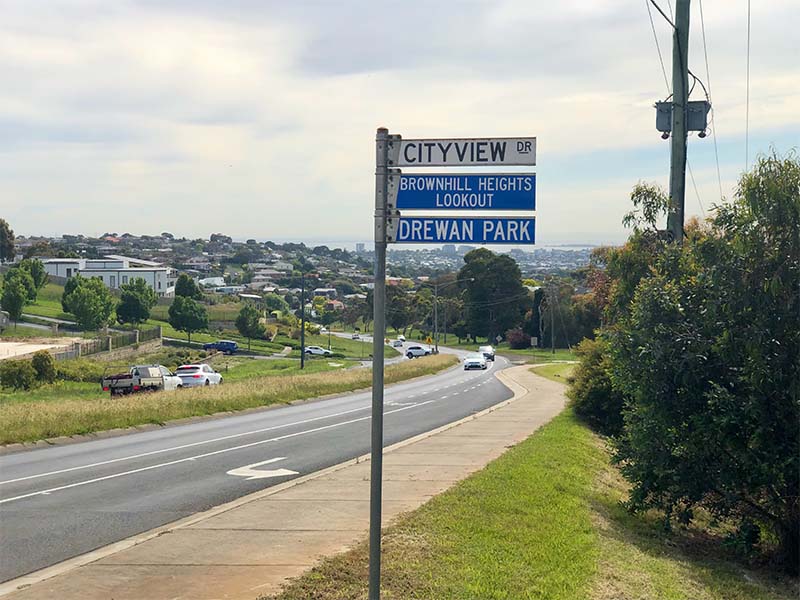
Signpost on Barabool Road
How To Get To Wandana Heights Lookout
Wandana Heights Lookout is situated in the outer suburb of Wandana Heights. It also goes by the name of Brownhill Heights Lookout. It is located on City View Drive, Wandana Heights.
Driving: About 8km from the Geelong city center, towards the town of Ceres.
Walking: 2 hours walk from Geelong city center, keep in mind there’s a big hill to walk up!
Public Transport: #43 Bus from Geelong city center, then a 10-minute walk.
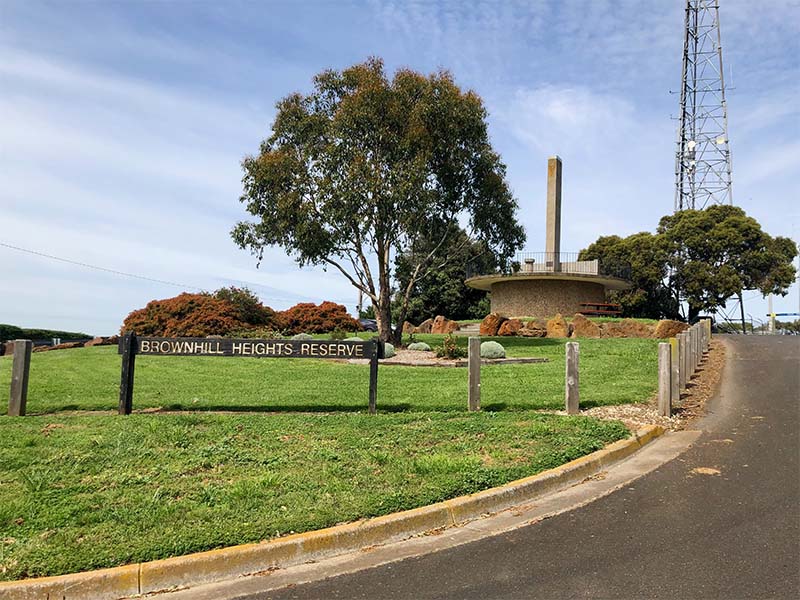
The Entrance to Brownhill Heights Reserve
The View From The Top
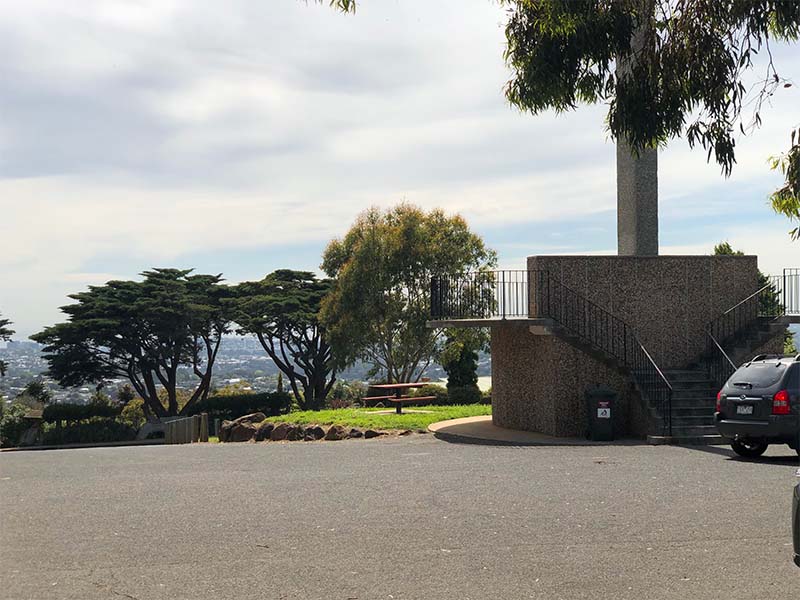
When you arrive at the lookout there is a small tower with stairs to climb, but no wheelchair access, unfortunately. I was a little disappointed by the number of neighborhood trees blocking some stunning views.
Wandana Heights Carpark Lookout
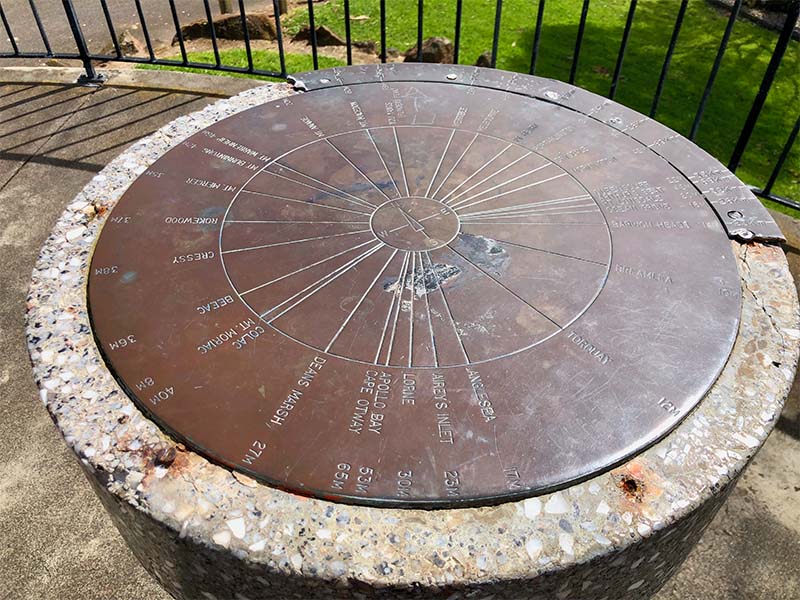
A novel feature is the direction plaque at the top, which indicates the direction and distance to the towns and features in the region. It will surprise you how close everything is – only 30 miles to Lorne!
You probably get to see about 50% of the Greater Geelong layout, but unfortunately, miss out on seeing the city center. Fear not, there are more views to see.
The Unique Directions Monument on the Lookout
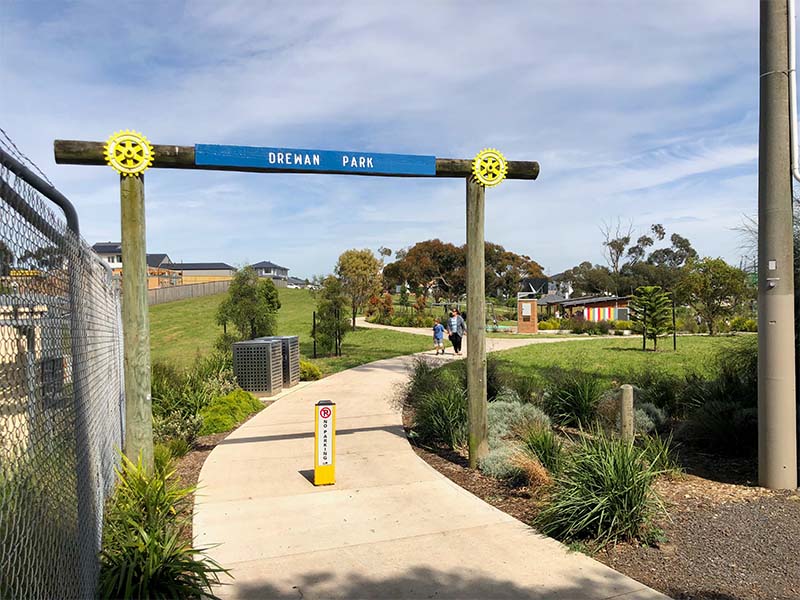
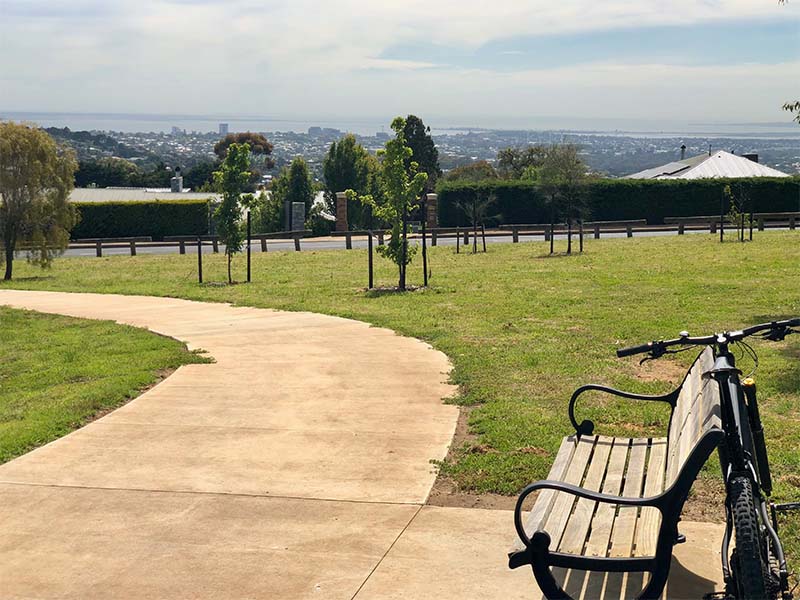
Drewan Park
Right next to the Wandana Heights Lookout is Drewan Park. Here you will find some wonderful playground equipment, free electric barbecues, toilets, and some great views. I found one park bench in particular which offers stunning views of the city center.
Park Bench Views in Drewan Park
When you visit Wandana Heights Lookout, make sure you take the time to stroll around Drewan Park. Check out some park benches, or betters still, enjoy a barbecue!
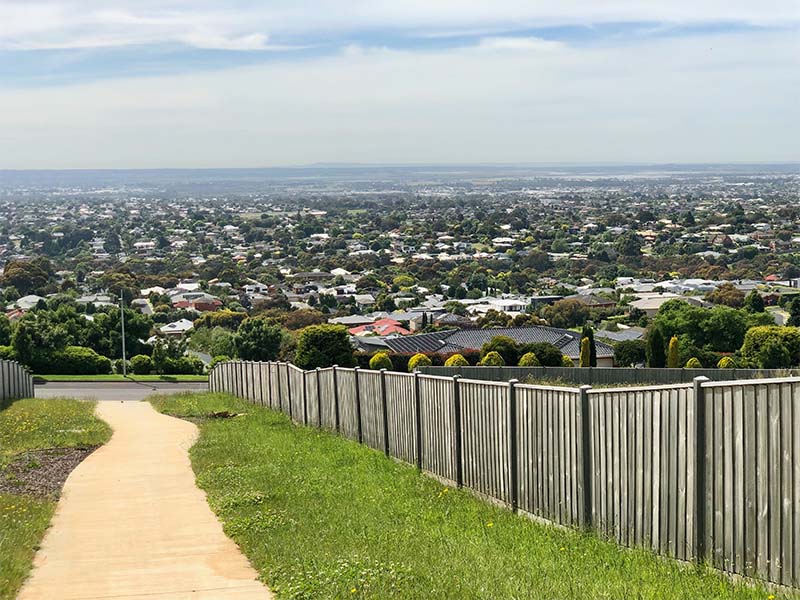
Views From The Neighborhood
The views don’t stop there. Take a drive or walk around the neighborhood, and you will discover stunning views looking in every direction. There really are some lucky home owners up there at Wandana Heights, after all, it is one of the most expensive neighborhoods in Geelong. It’s worth a drive just to check out those amazing homes!
Check out the stunning views in the hood
Enjoy Brownhill Heights Lookout and Drewan Park
I say it’s worth taking a couple of hours on a nice day to enjoy the park and lookout. Chill out, have a picnic or barbecue. When you’re done, check out the neighborhood and marvel at the amazing houses in the area. And of course, check out our full list of Top Things To Do in Geelong.
When it comes to things to do in Geelong, you can’t overlook Buckleys Falls on the Barwon River.
Note: This post may contain affiliate links. Please read our disclosure policy for more information.
Getting to Buckleys Falls Geelong
Buckleys Falls Lookout is about a 5km drive from the city center, located in the suburb of Highton. If you are really keen it’s about a 1-hour walk from the city center, or you could catch the #43 bus from the city center. The bus will drop you off very close to the lookout.
Buckleys Falls are not very spectacular, but they are the only waterfalls on the Barwon River and the only waterfalls in Geelong.
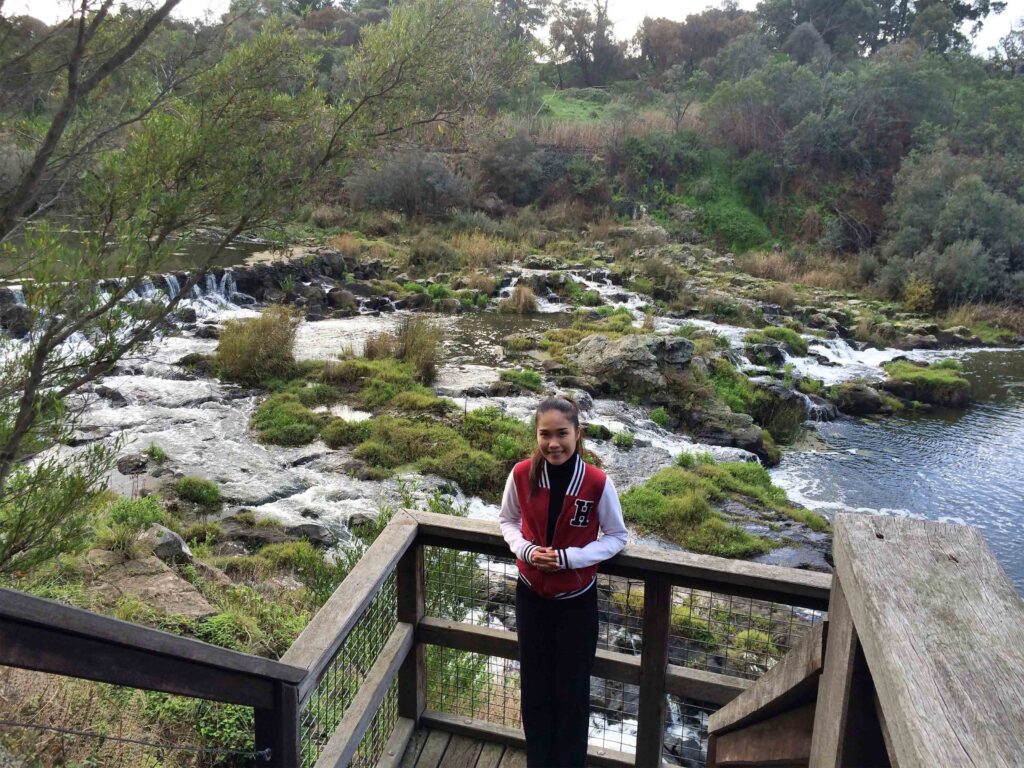
Upper Lookout at Buckleys Falls
There is an upper viewing platform with perfect views of Buckleys Falls, and these are located within 1 minute’s walk from the car park.
For those with more energy, you can take some wooden stairs down to the base of the falls. This will take you 5-10 minutes and is well worth the effort, as you can get up close to the Waterfalls.
Lower Lookout Platform at Buckleys Falls
Walking Trails at Buckleys Falls
If you have even more energy, there is a series of approximately 20km of walking trails that start at Buckleys Falls. The trails will take you along the Barwon River right up to the Breakwater bridge, and there are several bridges to cross the river. There are trails on both sides of the Barwon River – aptly named the Barwon River Trail.
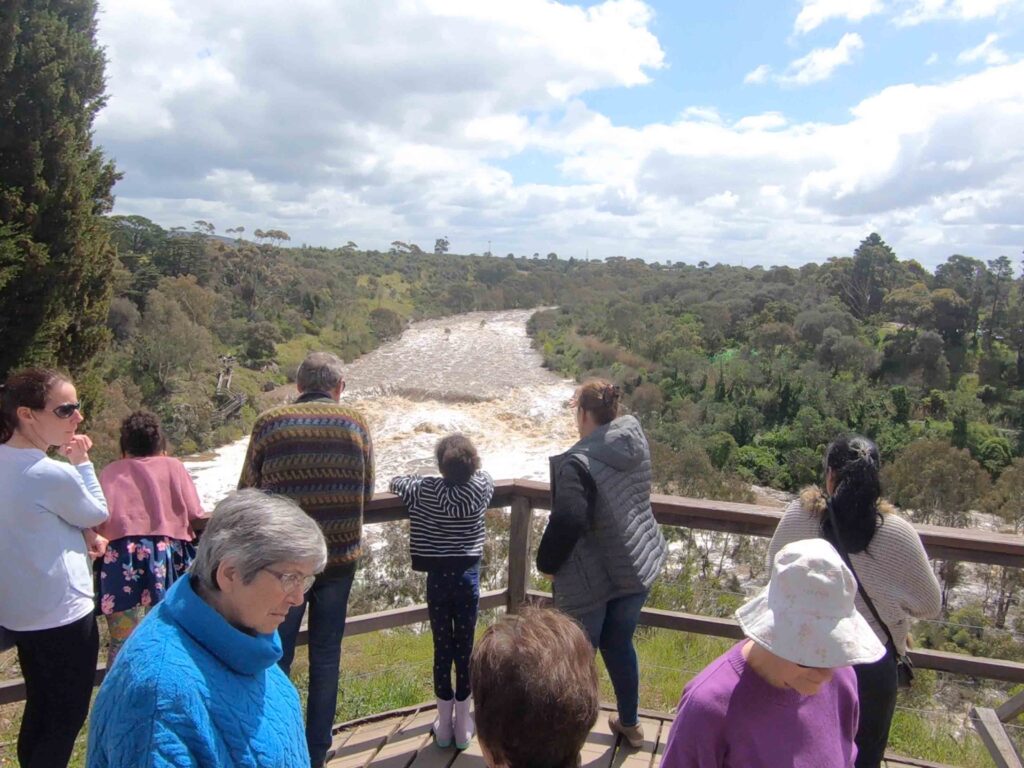
Buckleys Falls in Flood
The Barwon River often floods, and this is a great time to see Buckleys Falls. Check out the video below to see what Buckley’s Falls looks like in the flood.